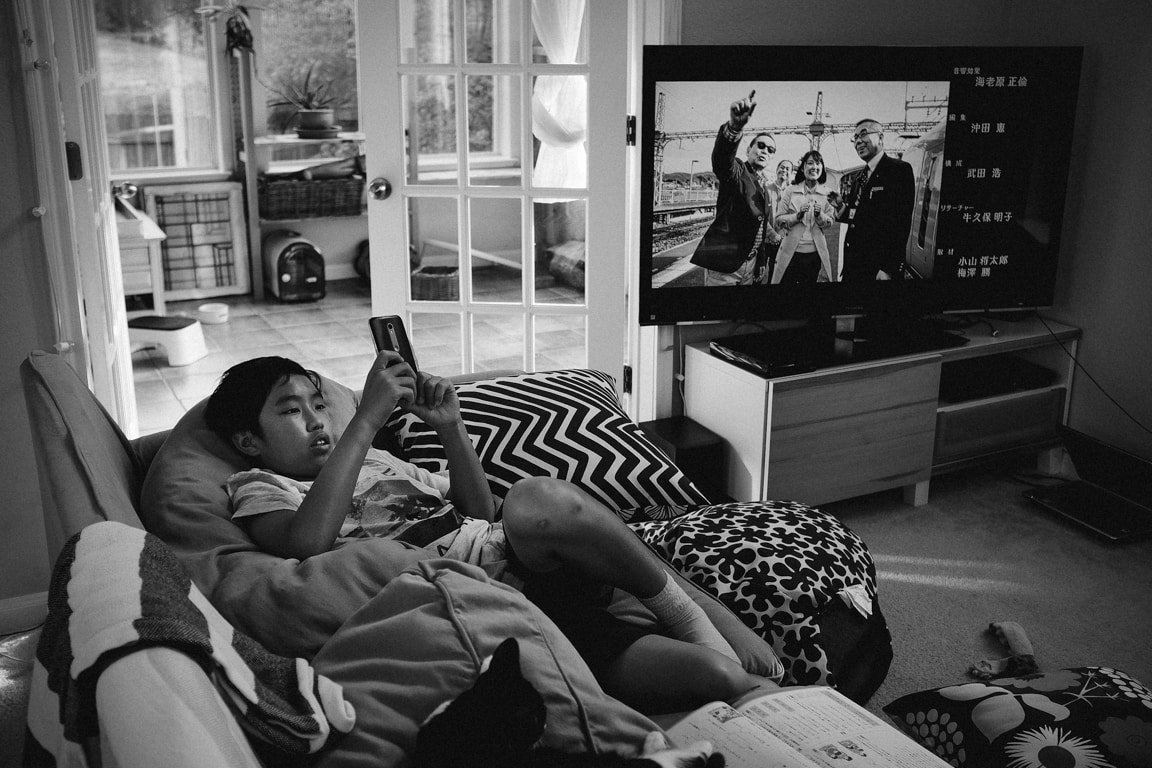
Photo info: FUJIFILM X100T, 23mm, f/2.8, 1/250 sec, ISO800 “Sunday Downtime” Cedar Park, 2016
こんばんは!Hello, how’s it going?
Today was a relaxing day, although I did do a couple of DIY tasks (cutting some wood for a shelf, and fixing a toilet), but what was the best part of today was watching TV! In particular, by chance, there was a television program on called “Kyo、burari” which is sort of like a walking tour of Kyoto neighborhoods. Today’s episode was around Kyoto University and they visited a small boarding house apartment for students. It reminded me of my first apartment when I lived in Japan.
It’s funny, but because the episode took place in summer and I moved into the apartment at the same time, I felt memories coming back to me that had been long forgotten. The sound of the cicadas, the look of that old, small apartment room, filled me with a natsukashii (nostalgic) feeling. Also, because the tv program is sort of a walk around the city, the transition to the empty apartment was something that I experienced firsthand. When I lived in that apartment, I didn’t want to stay inside… I spent most of my time out in the city, walking around and exploring.
So, it was really nice to watch the show today and relive some of those feelings. And it was very unexpected to see that show, because it’s not scheduled on our TV Japan programming, but for some reason the previous show was cut short and they had to fill the time with another program.
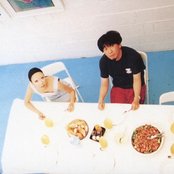
Today’s photo is of our family room, and you can see Koa and Anko on the sofa,and the tv showing a different Japanese program. That was our Sunday!
Photo info: FUJIFILM X100T, 23mm, f/2.5, 1/100 sec, ISO640 “Weekend Morning” Cedar Park, 2016
こんばんは!Good evening! How was your Saturday?
Mine was pretty good. Very busy taking care of things, but it was all good. I spent a lot of time watching a Japanese television drama, or “dorama”, called “Hayako-sensei, Kekkon Surutte Hontou desu ka?” which translates as “Teacher Hayako, will you really get married?”.
The story revolves around a 34-year-old unmarried elementary school teacher and her coworkers as they try to transition from single-life to getting married. It’s pretty funny and lighthearted, and I like the main actress, Nao Matsushita a lot. Her character is good natured, but clumsy personality-wise. Come to think of it, there’s not really much of a plot except for them going on dinner dates and trying to make connections with possible love-interests, but it’s fun and not too over-the-top silly as many dorama sometimes get.
I made it through episode 6, and this series will end at 9. It’s been a while since I watched an entire dorama series, and I’m glad I found this one! Looking forward to the next episode!
Today’s photo was taken early this morning. Two essential items for me to start the day, a cup of coffee and my email. I guess that is typical of life these days for many people, isn’t it?
For the camera settings, I used the standard Fujifilm film simulation Provia, and added some sharpening and grain in Lightroom. It’s a simple photo, but I am pleased with the overall feeling. And I love the Provia colors. Fujifilm really did a great job with their jpegs… they really have a nice character to them. I always felt that my Sony and Canon jpegs lacked any feeling… they looked so sterile, cold, computerized, and precise, whereas the Fujifilm jpegs are very warm, natural, inviting, and analogue in feel.
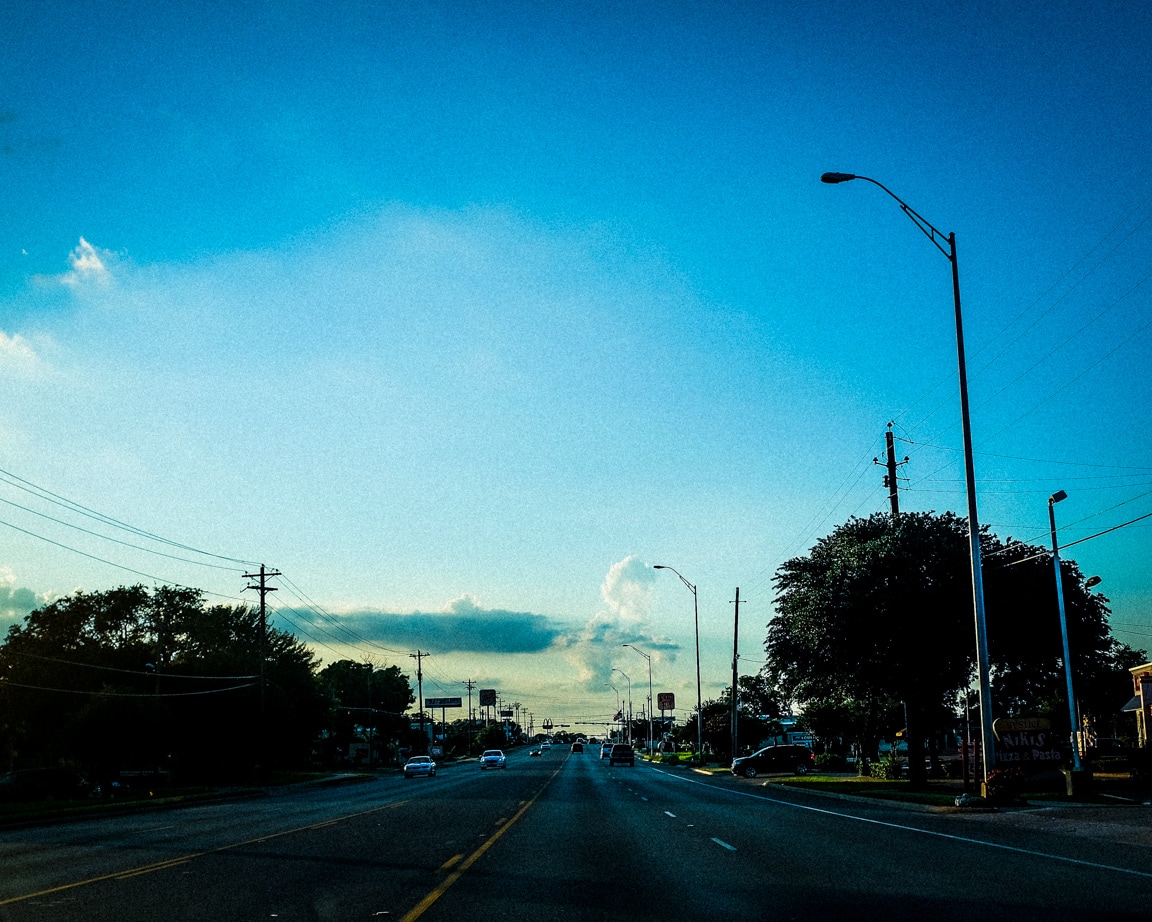
Photo info: FUJIFILM X100T, 23mm, f/2.5, 1/5400 sec, ISO400 “On the Road” Cedar Park, 2016
こんばんは!How’s it going? Have a good Friday?
This evening, I took Koa (12) to the batting cages to get some hitting practice in. He was a little rusty, not connecting so much at the beginning, but after about 10 minutes he improved and was smacking them with pretty good power. He love baseball so much, both playing and watching pro games on TV. I hope he continues to enjoy it through middle school and even joins the high school baseball team. That would be cool! ⚾️
Tonight’s photos were taken on the way to the cages. Before we left, I pre-focused my camera to a distance of maybe 50 feet and left it in M focusing. But I goofed and didn’t stop down the aperture. It was pretty wide at f/2.5 but it still came out in focus for the most part. Of course, I am not looking at the camera while I drive, but just kind of shoot in the general direction. It’s kind of fun to take photos this way, especially on the street. I’ll sometimes set the camera so that the LCD screen is off and just point the camera and snap. Since my X100T is a 35mm equiv. focal length, I have a very good chance of framing it close enough. And with each try, I seem to be getting better.
In Lightroom, I used a preset that I created to get to a good starting point, then I adjusted the exposure and lessened the vignetting a bit. I chose one of my 3 grain presets to give it the look I wanted before exporting.
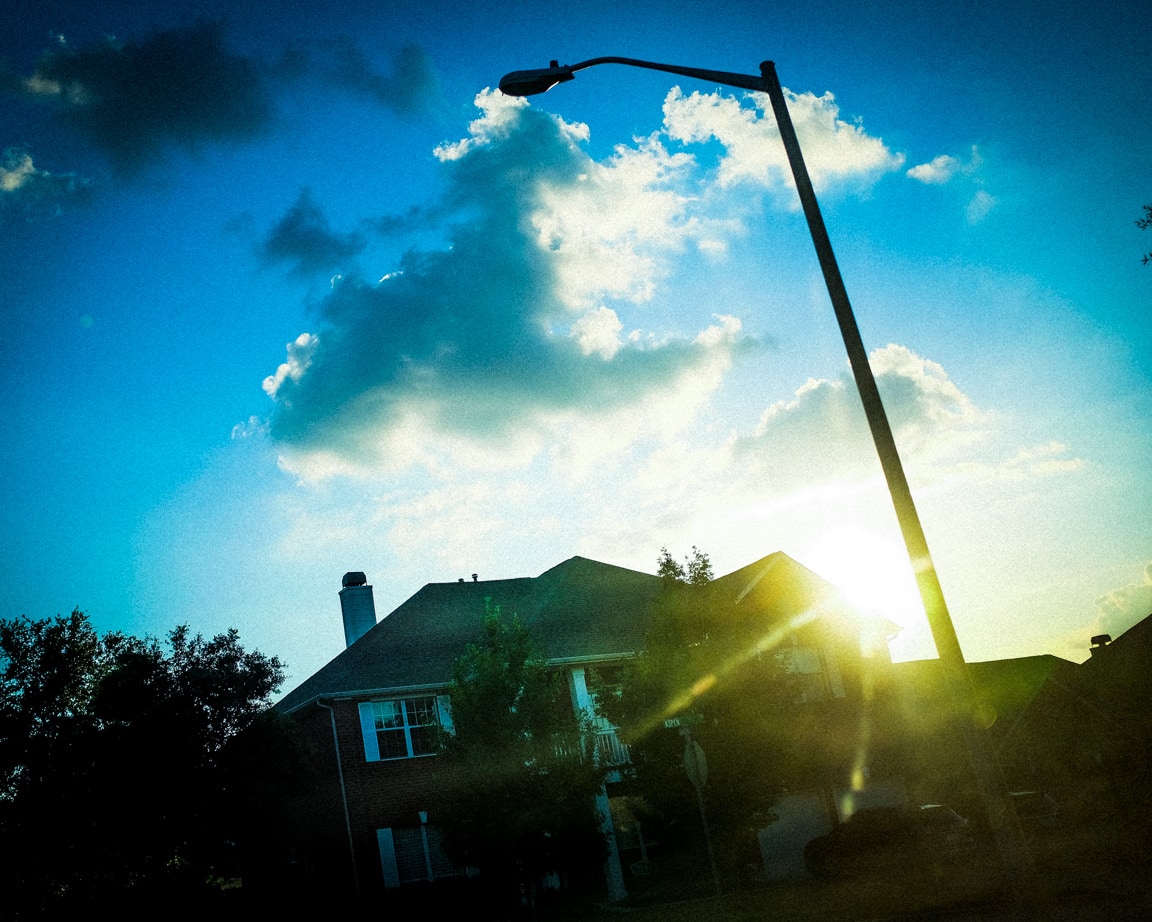
Here’s another photo I took on that drive to the batting cages. I used similar settings as the first photo.
Photo info: FUJIFILM X100T, 23mm, f/2.5, 1/5400 sec, ISO400 “Neighborhood Sun” Cedar Park, 2016
Well, I’ll see you tomorrow! For now, I’m going to watch some Japanese dramas before going to bed.
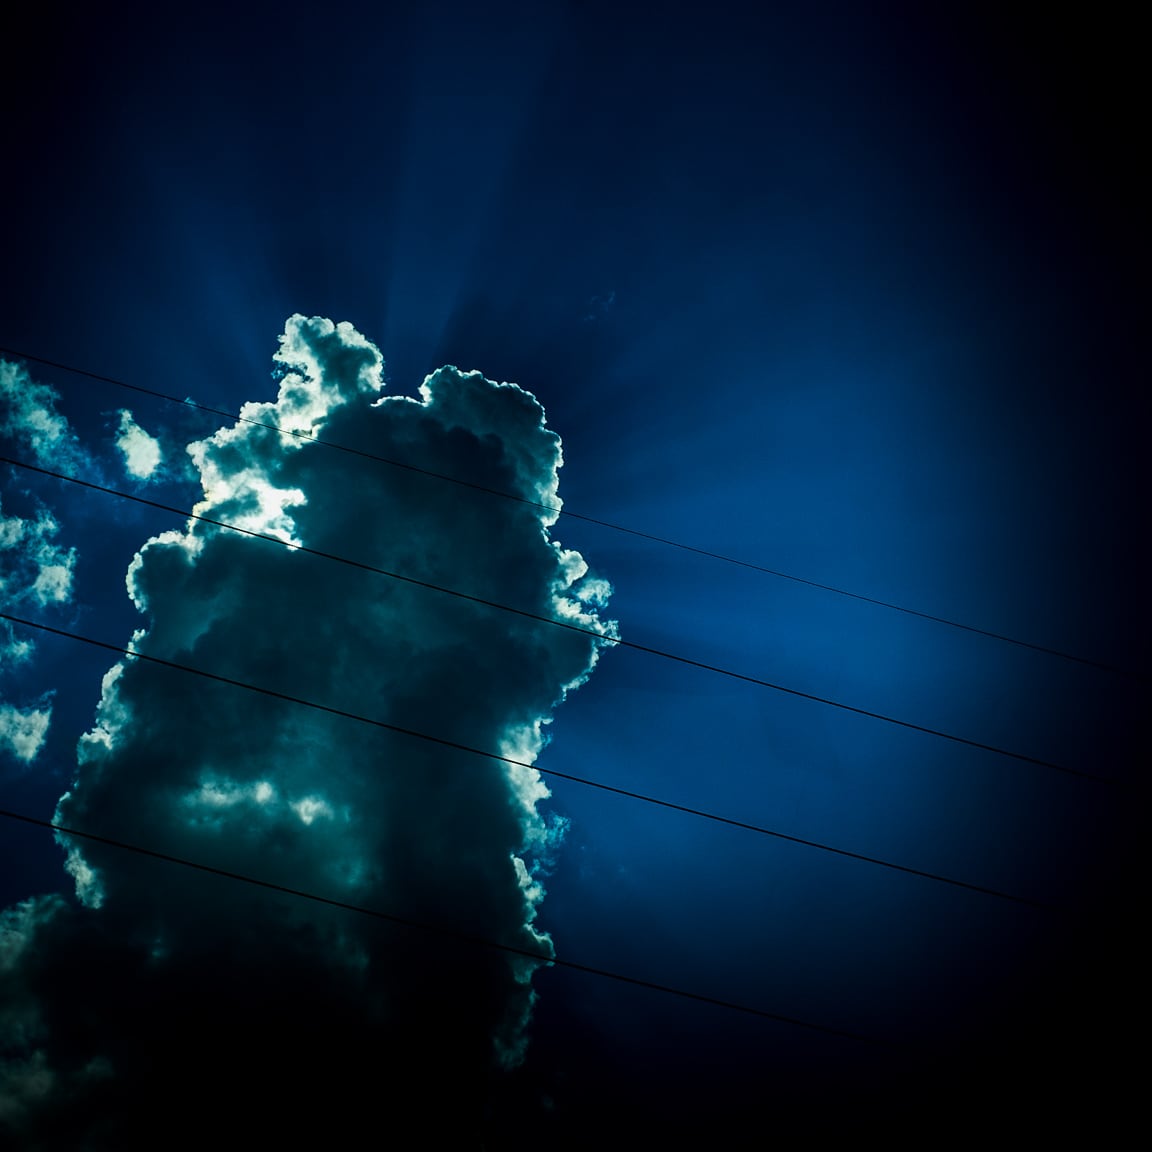
Photo info: FUJIFILM X100T, 23mm, f/6.4, 1/950 sec, ISO400 “Saying Hi” Cedar Park, 2016
こんばんは!Hello, how’s it going?
Well, I didn’t expect to take another cloud photo for today’s snapshot, but as I was doing the dishes this evening, this beautiful cumulus specimen appeared over the trees to say hello. I couldn’t pass up the chance, so I shut off the water, grabbed my camera which was in the other room, then came back to the kitchen to take four photos of the cloud. I liked this one the best, and deleted the other three.
I am a big proponent of only keeping the best version of a series of photos if possible. In this case, the other three were simply different views of the same scene, some farther away from the window, and some closer. The photo above was the image that I felt was framed the best by the window, so it became the “keeper” and the other three got the “X” (marked for deletion).
I’ve heard people say that you should never delete any of your photos. Storage is cheap, after all. It doesn’t cost anything extra to keep every single photo you take, right? While this may be true, I personally found that I was paying the price in speed. The large amount of images was bloating my Lightroom catalog and slowing things down.
Conversely, by only keeping one photo from a series of images, my Lightroom catalog is lighter and more responsive. Plus there’s less visual clutter when I scroll through the catalog, or when I browse my images online at photos.google.com. I can scan quickly. I don’t have to wade though a bunch of mediocre versions of the same subject (and believe me when I say that I capture a TON of mediocre images!).
For me, it’s important to cull the photos soon after Iimport them into Lightroom or copy them to my computer. (I even try to delete photos before that in-camera) The quicker I get rid of those photos, the less time they have to make an imprint in my mind. I believe everything takes a portion of the brain’s attention, even a tiny bit of my subconscious. So, once the photos cease to exist, it frees that part of my brain’s hard drive, as well as my computer’s hard drive. At least that is what I believe. 😌
When I first began culling my photos, it wasn’t easy to delete photos. Yes, I was a digital hoarder at the time! But one thing that helped me was to imagine that my Lightroom catalog was a slideshow that I would be presenting to an audience. Would I want to show them 4 pictures of the same cloud? No way. They would get bored (and annoyed) quickly. I would pick the best photo to show them, and respect their time and attention. So why wouldn’t I treat myself with the same respect?
Once I got comfortable with culling quickly, it became easy, and it actually became fun! Making decisions and not looking back or regretting my actions gave me a sense of control. It won’t change the world, but it did affect the way I felt. Plus, once you start decluttering, it just snowballs and it feels great!
Okay, I seem to have rambled on a bit (again). So, back to the photo at hand…
For the Lightroom edit, it was similar to my previous post’s photo, with the addition of selective white balance. I gave the cloud a warmer tone, and the sky a cooler tone. That’s it! I’d estimate that I spent about 4 minutes in Lightroom before exporting.
I hope you had a nice day today. Let’s have a great Friday to close out the work week!
As always, if you have a comment or question, let me know.
For the past week or so, we’ve been fortunate to have some amazing-looking clouds in the skies here above Austin. ☁️☁️☁️ And of course, I’ve been taking many pictures of them!
The photo above was taken from my car while I was on my way home from work. (Don’t worry, I was stopped at the light) The sky was very bright, with the sun behind the cloud, but the camera was able to capture most of the details. I keep the exposure compensation dial set to underexpose by 1/3 to 2/3 of a stop because I would rather keep my highlights intact and don’t worry about clipping the shadows. In fact, during post-processing, I will often let the left-side of the histogram go full black. I guess I like that high-contrast, richness on the darker side.
As you can see, the image is not very realistic, but I am not really going for capturing reality. I love that there is so much detail in the center of the clouds which you really cannot see with the naked eye. Why not bring it out in the photo? Of course the photo started off as a picture of a real cloud, but I’ve edited it into a version of the cloud as I would like to see it.
There is has been a lot of discussion in the photo blogosphere about Steve McCurry photoshopping his images, with some people feeling betrayed or tricked because of the edits. But I am not bothered by the photo manipulation. If you are creating art, then go for it! If you are documenting real-life, then don’t edit. That’s fine too. But be honest and don’t deceive people. If someone asks me if my photo has been edited, I’m more than happy to explain exactly what I edited. That’s part of the process.
Even as I take photos of everyday life, I will do some amount of editing. That happens before I even press the shutter button since I have already chosen my film simulation and highlight, shadow, and sharpness settings.
For my post-processing in Lightroom (version 5x), here are the steps I typically follow:
Level and/or “upright” – I will use the level tool in the cropping area to make sure horizons are level, and for architectural photos, I’ll use the Upright tool in the Lens Correction section. I didn’t do this step for the cloud photo, however.
Crop – My preferred aspect ratio these days is 4×5, but this photo was taken square in-camera.
Remove dust, distracting smudges, or dirt – Spot removal tool. I didn’t need to for this photo.
Adjust white balance – Using the eyedropper as a start. Typically only needed for indoor shots.
Adjust tone-curve – I have saved a preset, a gentle S-curve, which adds contrast.
Tweak the exposure – Exposure, highlights, shadows, whites, and blacks sliders.
Adjust color – Vibrance, saturation, HSL. For this image, I brought the saturation down a bit.
Add grain and/or a vignette – Just a vignette for this image, albeit a strong one. I used a combination of Vignette in the Effects section, and then a few graduated filters with lower exposure.
Export – Resizing and saving for blog, Flickr, and Instagram.
Nine steps looks like a lot, but I can usually get through them in less than 3 minutes. I try to spend as little time in Lightroom as possible!
Well, this blog post kind of grew, didn’t it? 😝
I hope you had a nice Wednesday, and let’s have a great Thursday!
おやすみなさい! – B
Like this:
LikeLoading...
My camera & photos
I use a Fujifilm X-series camera for most of the photos on this site and my Instagram. Why not pick one up for yourself?