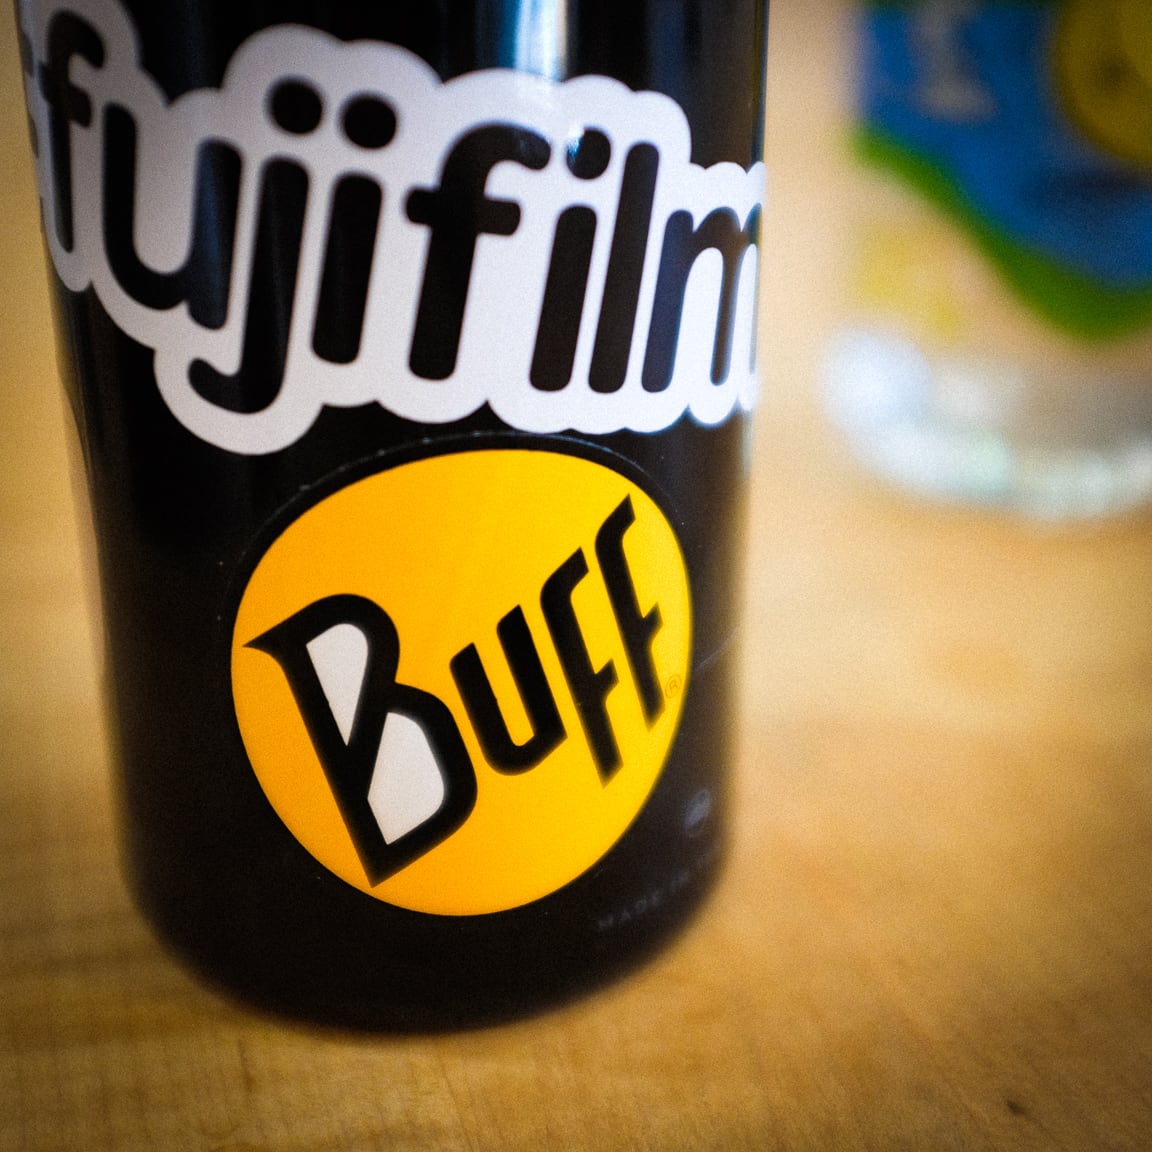
Photo info: FUJIFILM X100T, 23mm, f/2, 1/250 sec, ISO1000 “Stickers” Cedar Park, 2017
こんばんは。
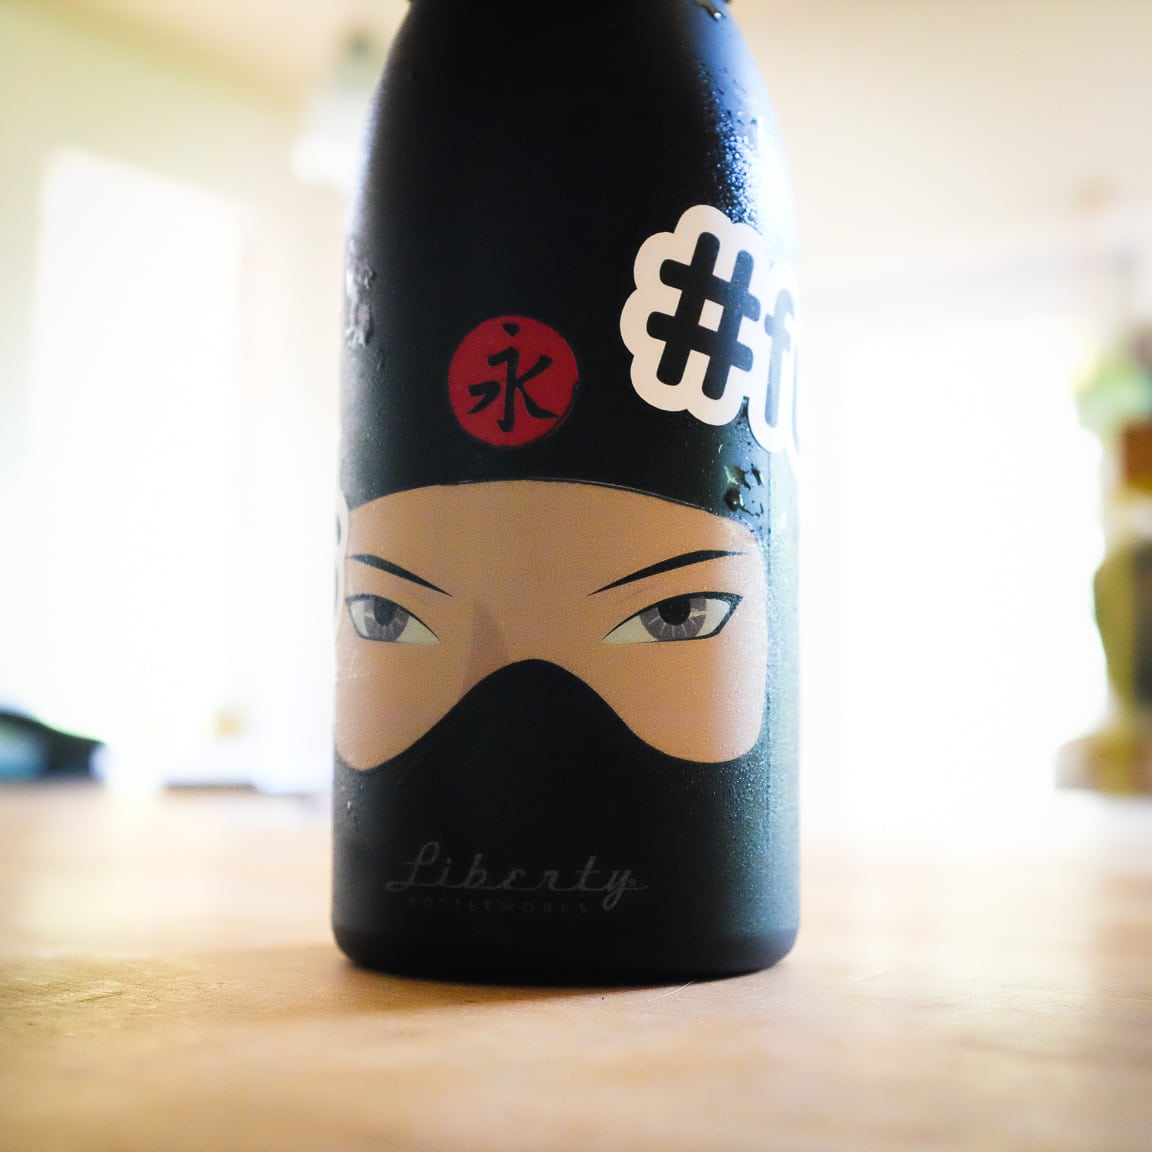
Today’s photo is of my Liberty Water Bottle, which I got a couple years ago. I like it because it isn’t too big and is great quality. I bought a 16 oz. black one which has a ninja/motorcycle helmet kind of design (with a poor attempt at the kanji for “mizu”), but it looks kind of suspicious since it is all-black. I guess I am just a bit paranoid about it, so I slapped some stickers on it to make it a little more conspicuous.
Photo info: FUJIFILM X100T, 23mm, f/4, 1/80 sec, ISO6400 “Kanji?” Cedar Park, 2017
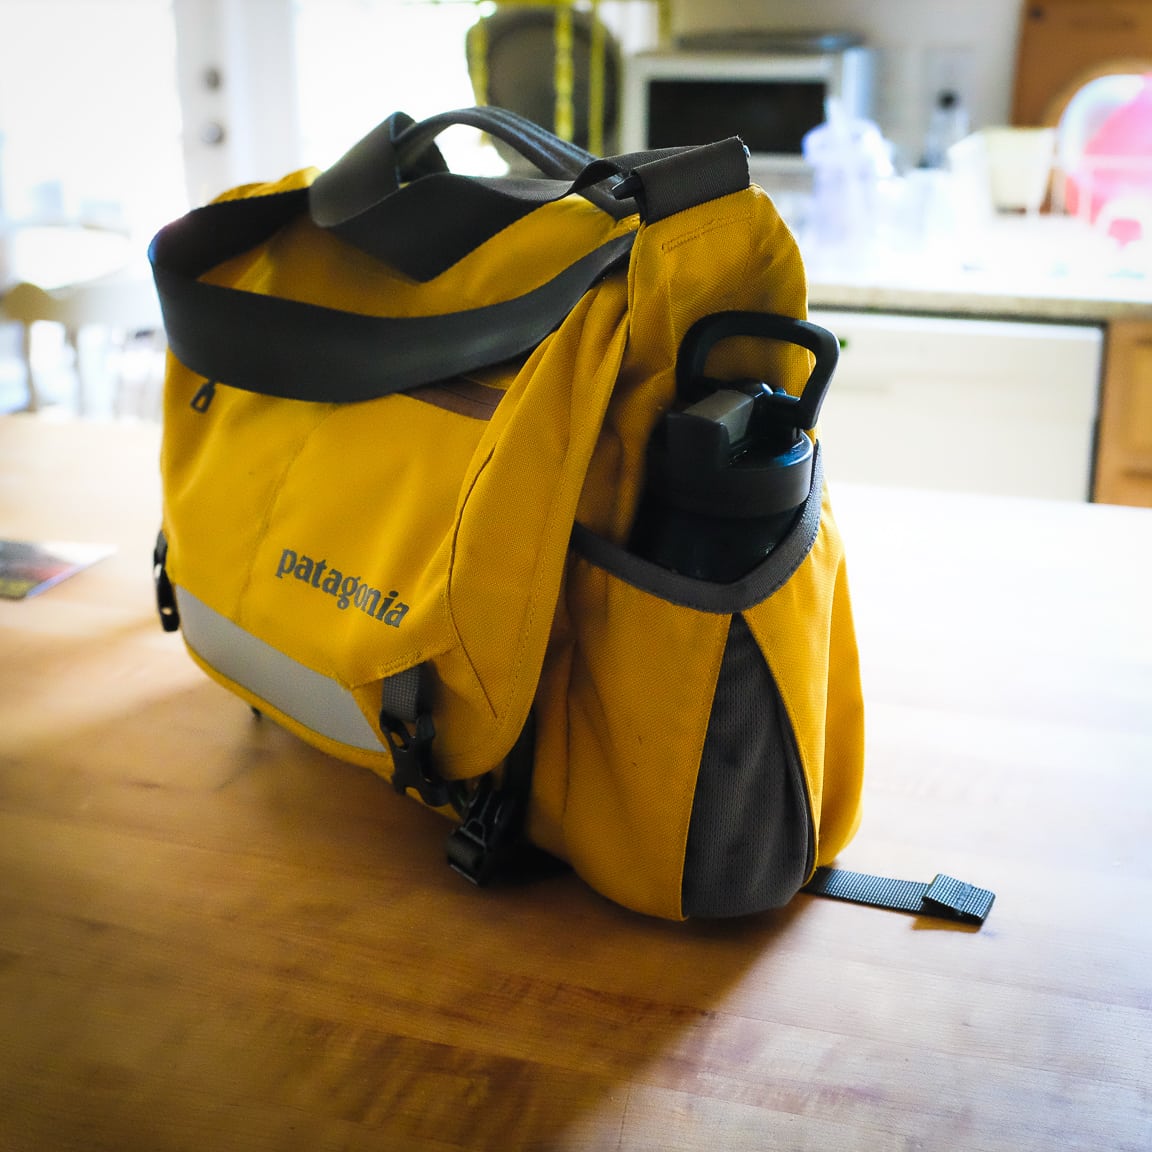
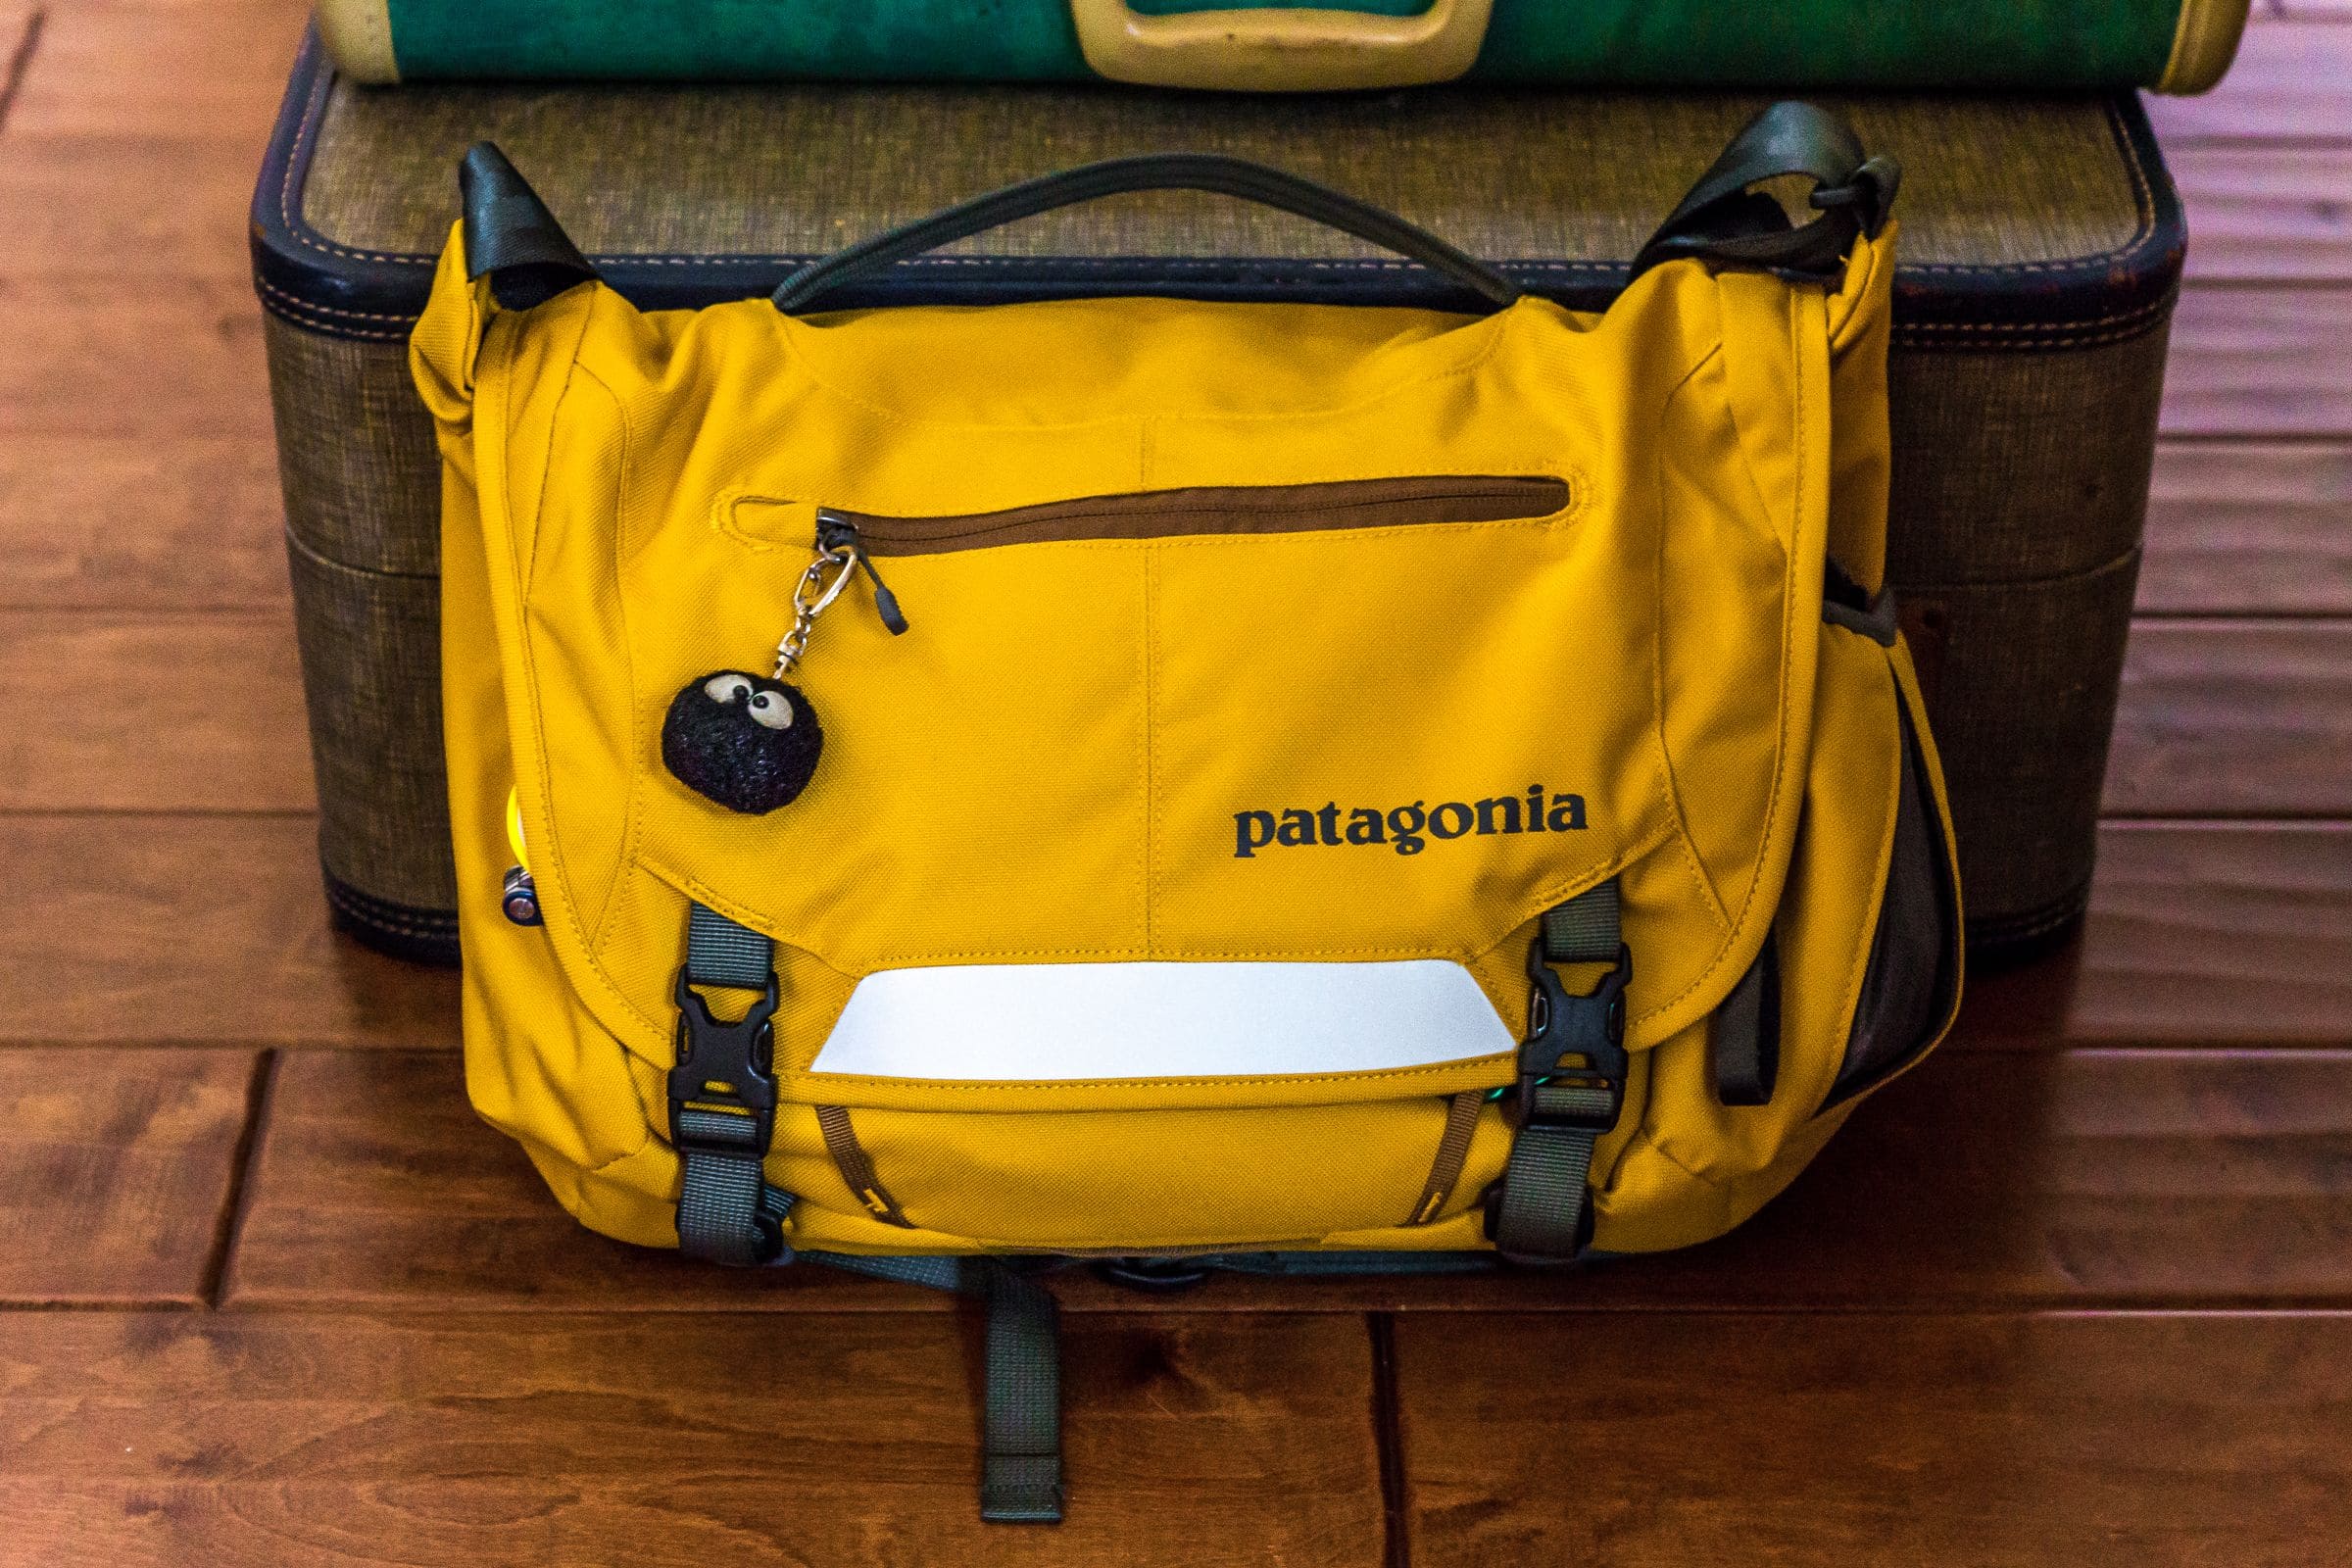
Even though my Liberty bottle is relatively small, it’s still just a tad too wide to fit comfortably in the water bottle holder on my Patagonia Minimass bag. It’s a really tight fit, and since I keep my Anker battery in the interior pocket on the other side of the holder, it has even less room and doesn’t slide in easily. So, I left the Liberty at home while I was traveling in Morocco, and I just re-used a small plastic water bottle that I picked up at the store. It made me a bit sad to use the environmentally unfriendly bottle, so I think I’d like to find a slim eco-bottle soon.
The Patagonia bag is pretty great, but the only downside is the single small water bottle pouch. If only it were a little wider! Perhaps a little DIY project is in order to remedy it. Or if there is an add-on holder that I could latch on somehow, that might work. Must look into this!
******************
Update: After fiddling around a bit, I moved the large battery back to the other side of the interior to make room for the water bottle. I think it will work!
Photo info: FUJIFILM X100T, 23mm, f/4, 1/100 sec, ISO6400 “Bottle and Bag” Cedar Park, 2017
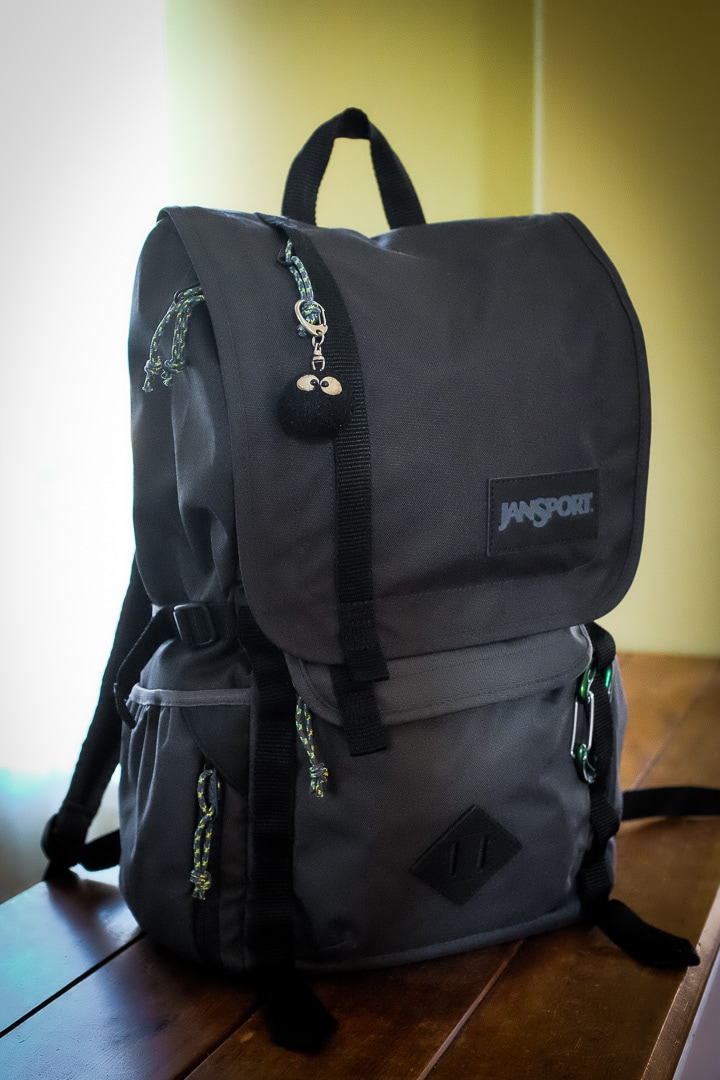
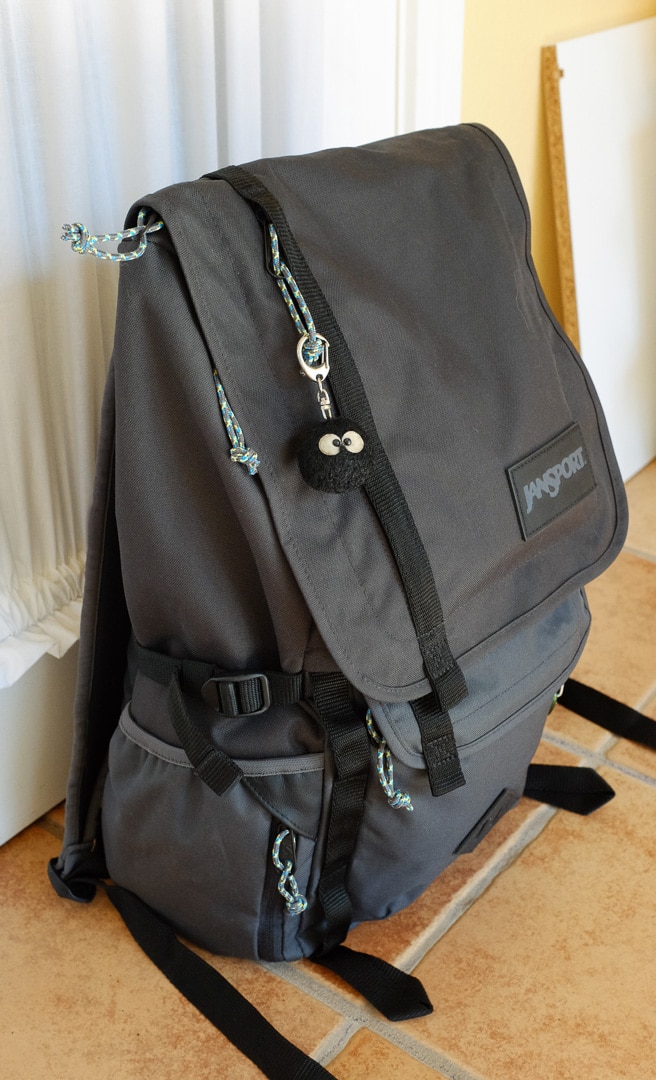
Photo info: FUJIFILM X100T, 23mm, f/3.2, 1/60 sec, ISO6400 JanSport Hatchet Backpack, in Grey Tar
I bought a new backpack a couple of weeks ago – the JanSport Hatchet Backpack, in Grey Tar. It’s has a 28-liter capacity which I’d consider a medium-sized pack, bigger than my Patagonia Minimass messenger bag, but smaller than my North Face Router (41-liter) backpack. Not only is it smaller than the Router, it is much lighter (but less rugged). The design of the top flap is what really attracted me to this bag. And not only the look, but the function. As with everything, there are pros and cons. So let’s dive right in with my JanSport Hatchet backpack review!
First off, the JanSport Hatchet comes in several different colors, including some special designs from custom shops. I went with the most incognito color, which is called “Grey Tar”. I think the dark grey material (subtly two-toned) paired with the black straps looks very handsome, and the blue/yellow zipper pulls are a very nice complement. The JanSport logo patch in faux leather is a nice dark color as well. The inside of this version is a nice bright blue which is great. It’s much easier finding stuff in brightly colored interior than a black interior. (Especially for people with poorer vision like myself!)
The straps have a nice soft texture and include a sternum strap. It’s very comfortable to carry, either on one shoulder or both shoulders. It’s got a standard haul loop on the top, and there is a small cutout for hydration pack tube.
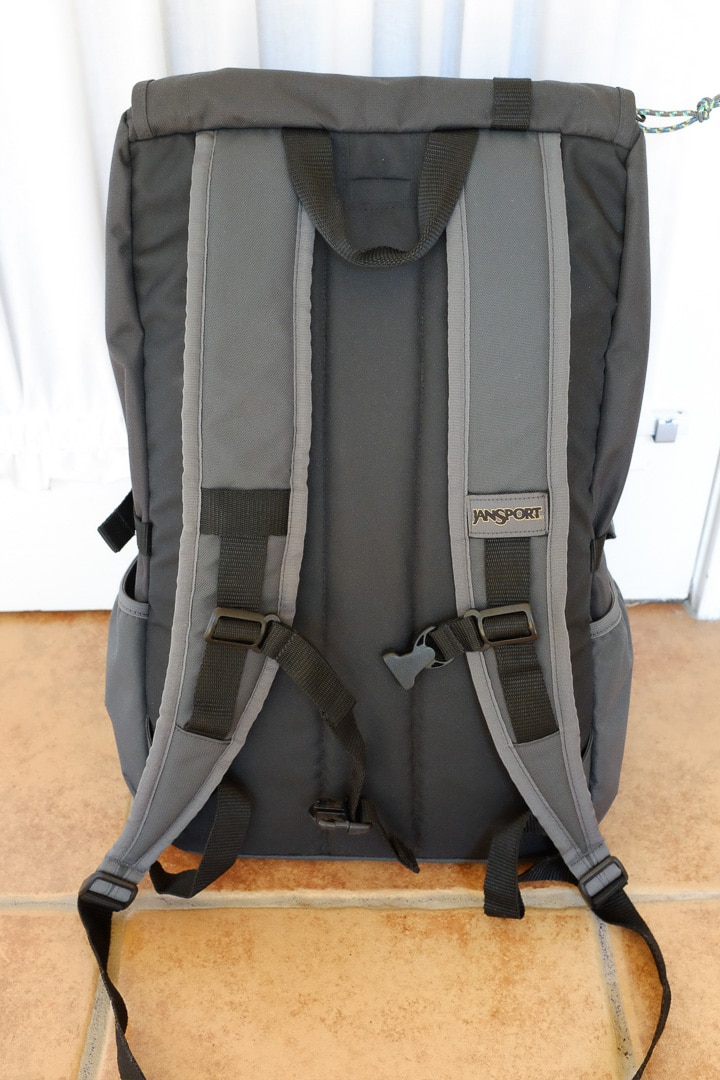
Photo info: FUJIFILM X100T, 23mm, f/5.6, 1/250 sec, ISO4000 Jansport Hatchet Backpack in Grey Tar (Back)
Each side of the backpack has a large elasticized pouch for water bottles or other items, and above those are compression straps to cinch down the pack a bit. I keep my Panasonic TS2 camera in one of these pouches.
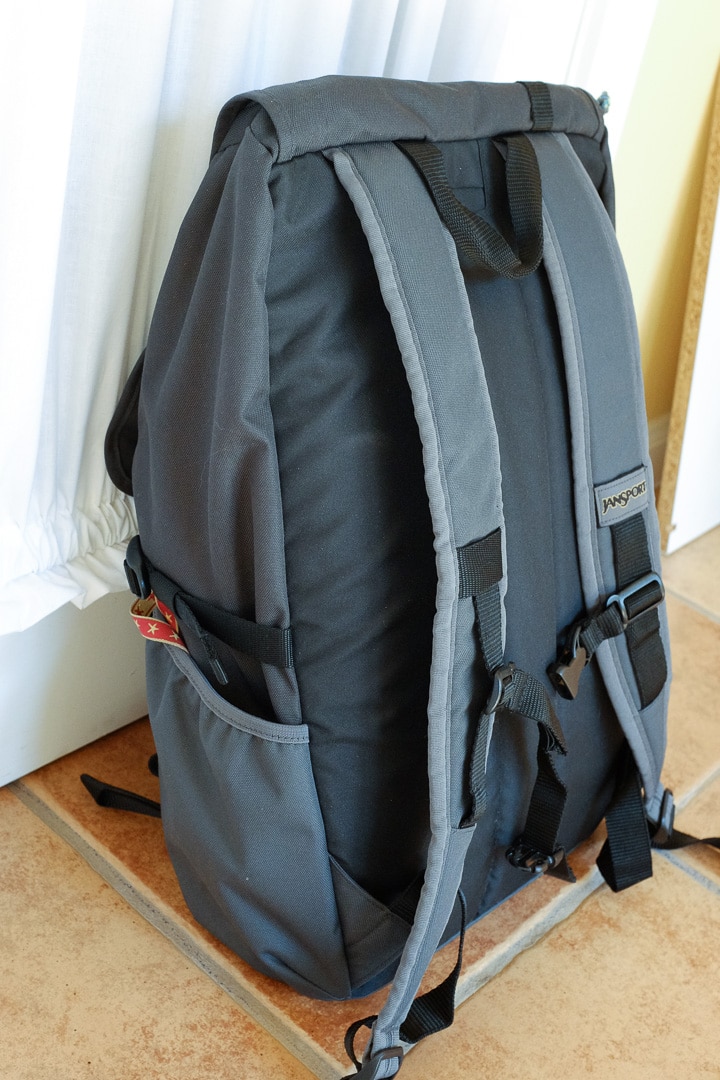
Photo info: FUJIFILM X100T, 23mm, f/5.6, 1/250 sec, ISO2500 Jansport Hatchet Backpack in Grey Tar (Back side)
The left side also has a zippered pocket, which is nice, but it’s pretty tight if you have something in the water bottle pouch. It’s great to have the drink pockets on both sides, which something my other bags lack.
Photo info: FUJIFILM X100T, 23mm, f/5.6, 1/250 sec, ISO2000 Jansport Hatchet Backpack in Grey Tar (Left side with zippered pocket)
The back has some daisy-chain style loops in the straps (where I have a green Camp USA Nano Carabiner), and also two loops at the bottom of the pack, for strapping on other items. I guess some people strap their yoga mats there. In the center, there is a small zippered pouch hidden under a flap. It’s not so big, but it doesn’t stick out too far. Inside this pouch, I keep my Totoro zippered container which holds stuff like aspirin, eye-drops, gum, and other semi-perishables.
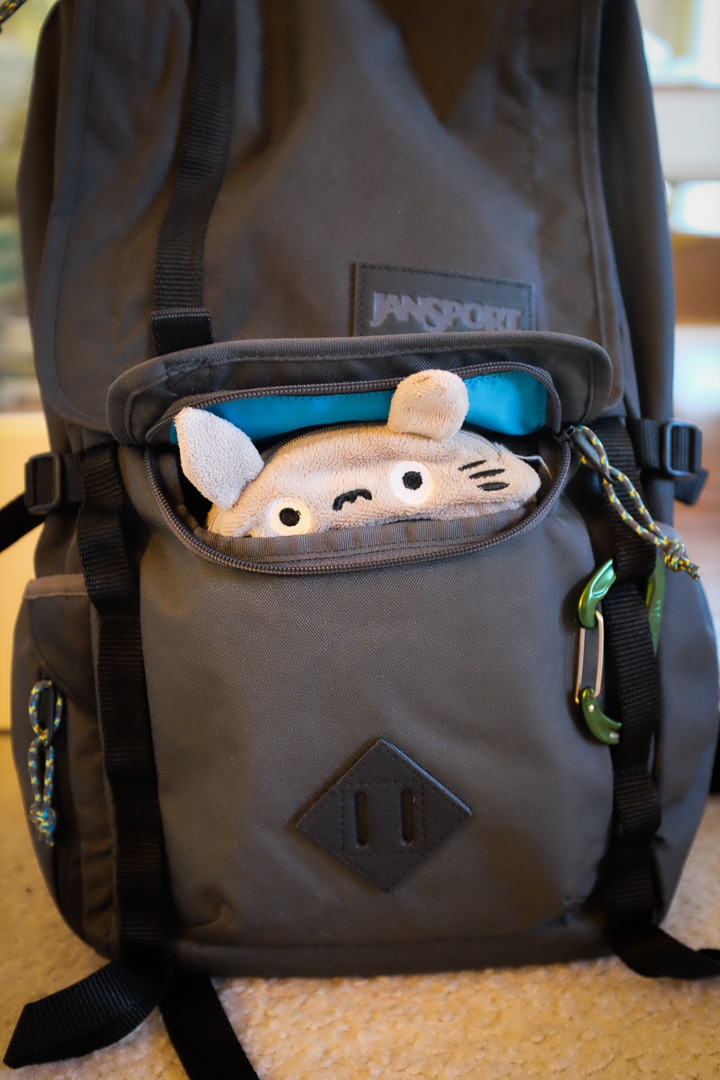
Photo info: FUJIFILM X100T, 23mm, f/3.2, 1/25 sec, ISO6400 Jansport Hatchet Backpack in Grey Tar (Small Pocket)
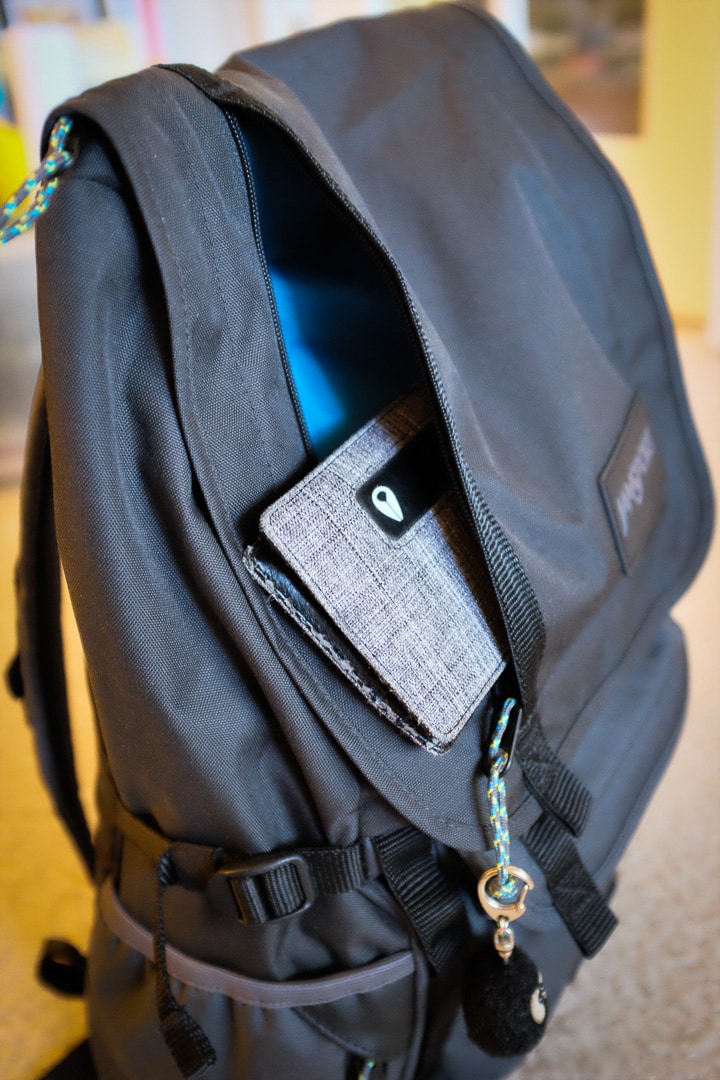
Above that, on the main flap, is a vertical zipper which opens a pocket on the lid. You can see in the photos I have my makkuro-kurosuke from Totoro/Spirited Away. This pocket is really convenient to access. I keep my wallet and keys in there, but it’s a large pocket (the full size of the flap) so you could fit a lot in there.
Photo info: FUJIFILM X100T, 23mm, f/2.8, 1/35 sec, ISO6400 Jansport Hatchet Backpack in Grey Tar (Vertical Pocket)
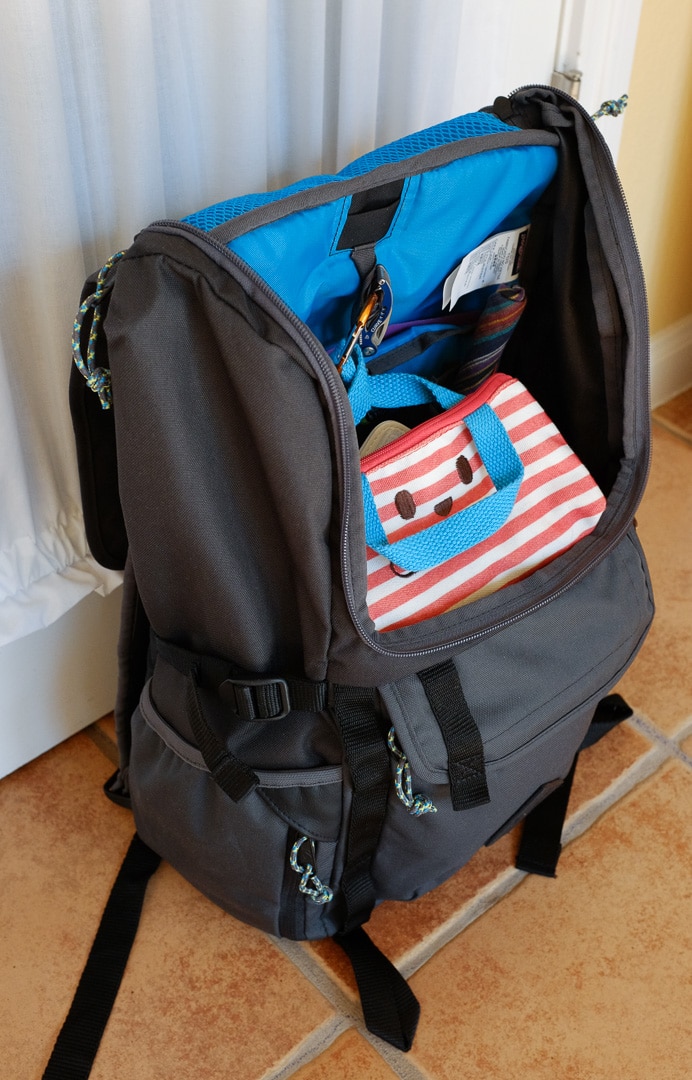
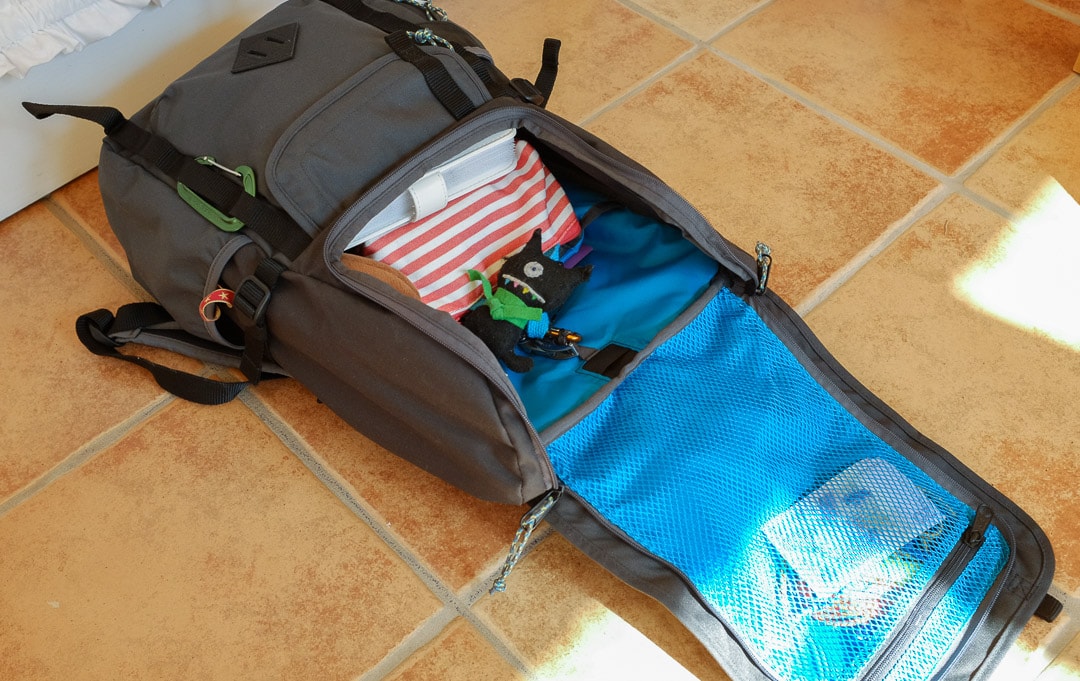
One of the things that drew me to this backpack was the way the main compartment opened. When you zipper open the flap, you have easy access to the contents. On a conventional backpack, you are reaching into it from the top. With the JanSport Hatchet backpack, you have a larger opening to access your stuff.
Photo info: FUJIFILM X100T, 23mm, f/5.6, 1/250 sec, ISO1600 Jansport Hatchet Backpack in Grey Tar (Open)
This is pretty nice if you have a lot of things at the bottom of the pack. For myself, I put my padded camera-bag insert in the bottom, and in it I keep my Instax Printer, extra pack of film, Instax photo album, my small camp towel, and my Fujifilm X100T camera.
Photo info: FUJIFILM X100T, 23mm, f/5.6, 1/250 sec, ISO3200 Jansport Hatchet Backpack in Grey Tar (Contents)
One thing to keep in mind is that if you have the main compartment filled with stuff, it might fall out when you unzip the pack since the opening comes down halfway. In that case, it might be better to put the pack down on its back and open it up laying flat. Another drawback of this flap design is that the zippers are a little harder to operate since the ends of the zipper tracks are not so taut. It just takes some getting used to, but even so, it isn’t the easiest bag to open.
Photo info: FUJIFILM X100T, 23mm, f/5.6, 1/250 sec, ISO2000 Jansport Hatchet Backpack in Grey Tar (Inside)
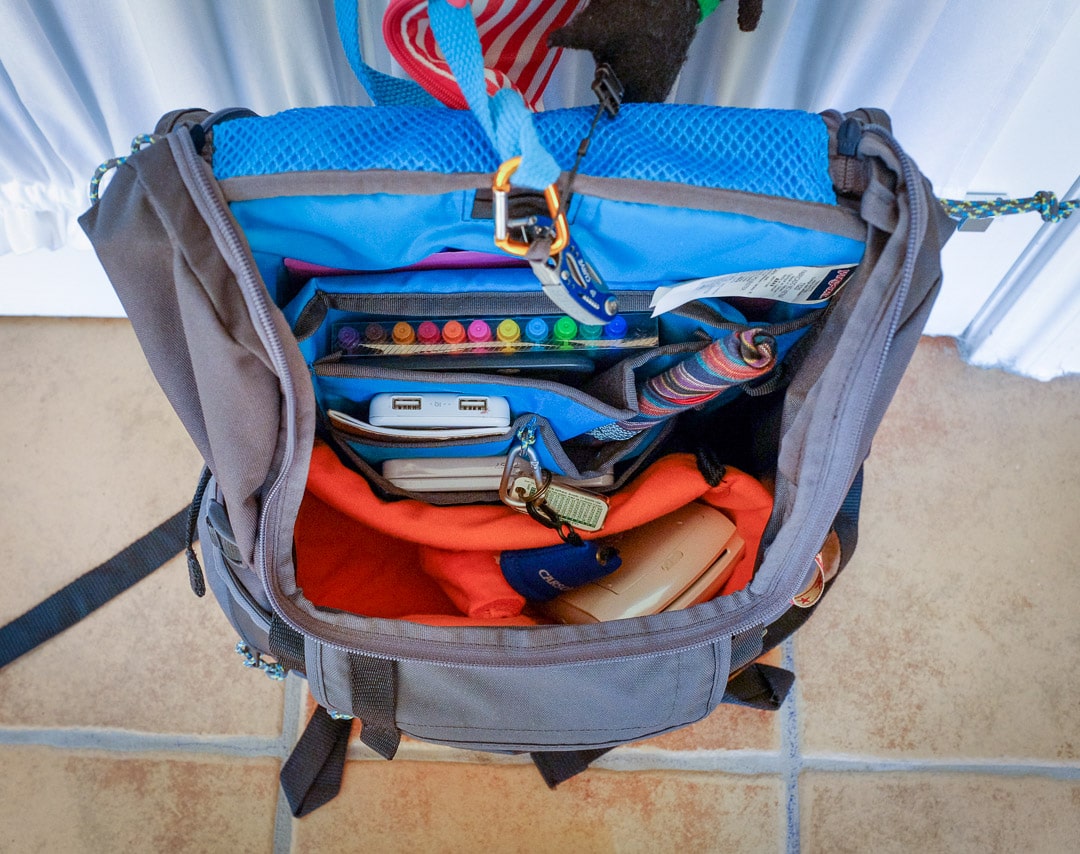
The rest of the main compartment consists of a lightly-padded space for a large laptop or hydration pack (I keep a clear file with papers in here), a smaller soft-lined sleeve for tablet-sized devices (I have my Kindle and Zebra McKee Colored Pens here), then two side-by-side pockets for smaller items, one of which is soft-lined. I keep my Anker battery, small notebook, Moo-cards in small Altoids tin, and a set of chopsticks. There is also a narrow mesh pocket which I’m not sure what you’d use for. Finally, there are two loops, one at the top of the pack, and one in the middle which has a carabiner attached. On the inside of the flap itself is a large, zippered mesh pocket. This is very nice since you can see what you have in this pocket without having to open it.
Photo info: FUJIFILM X100T, 23mm, f/5.6, 1/250 sec, ISO1600 Jansport Hatchet Backpack in Grey Tar (Open Flap)
Overall, I’m disappointed in the interior organization. For instance, there are no dedicated spaces for pens, nor are there any zippered pockets inside. In comparison, the seemingly much-smaller Patagonia Minimass messenger bag has many more pockets, including zippered, velcroed, pen pockets, and mesh. It actually organizes all of the items nicely, while the JanSport Hatched has run out of pockets! So, what is going on here? Well, the JanSport designers should have taken full advantage of the height of the backpack and extended the top of the laptop sleeve farther up towards the top edge of the backpack (up to the hydration opening). There are at least four inches there that they could have used to put more organizational pockets. Instead, it’s just a lot of wasted surface area.
Photo info: FUJIFILM X100T, 23mm, f/3.6, 1/30 sec, ISO6400 Jansport Hatchet Backpack in Grey Tar (Pockets)
Because of this lack of organization, I am using some extra bags and storage units. For pens, I have a red and white striped pencil bag that I found at Daiso. I hung it from the top loop (along with my ugly doll) and it hangs loosely in that wasted space. It actually hangs too low, so I am looking for a different solution that I can fill the space at the top of the backpack. For electronics-related items, I have a brown LINE character zippered pouch. It holds USB cables, USB wall plug, two camera batteries, LensPen, SD memory cards, and USB memory sticks. That just sits on top of my Instax Printer.
There may be other storage hacks I can apply to add more storage. For instance, if I can find the right kind of bag or pouch, I can fasten it to the mesh pocket so that it will sit high up in the interior space. It’s disappointing, though, that I have to look at adding more organization to this backpack. On my North Face Router pack, there are so many places to put things, I was wondering, “What should I use this pocket for? And this pocket?” But with the JanSport Hatchet, it was the opposite. I was wondering, “Where the heck am I going to put these cables? Where should I put the spare batteries?” etc. Even the Patagonia Minimass bag had more options. I guess I was expecting more from the backpack.
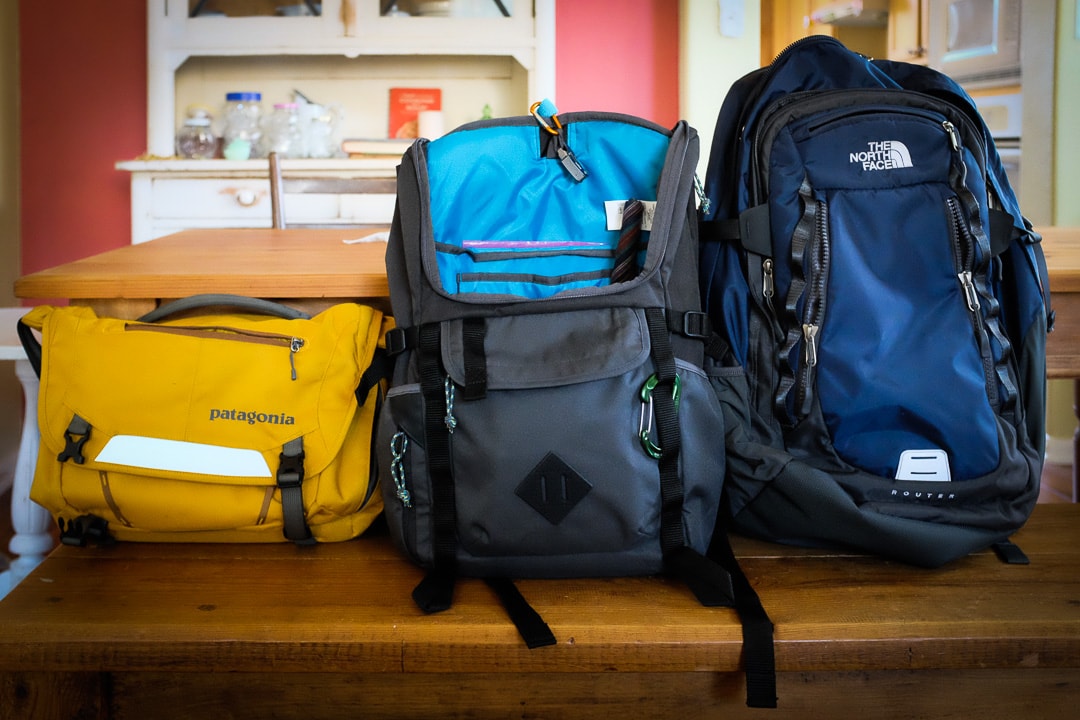
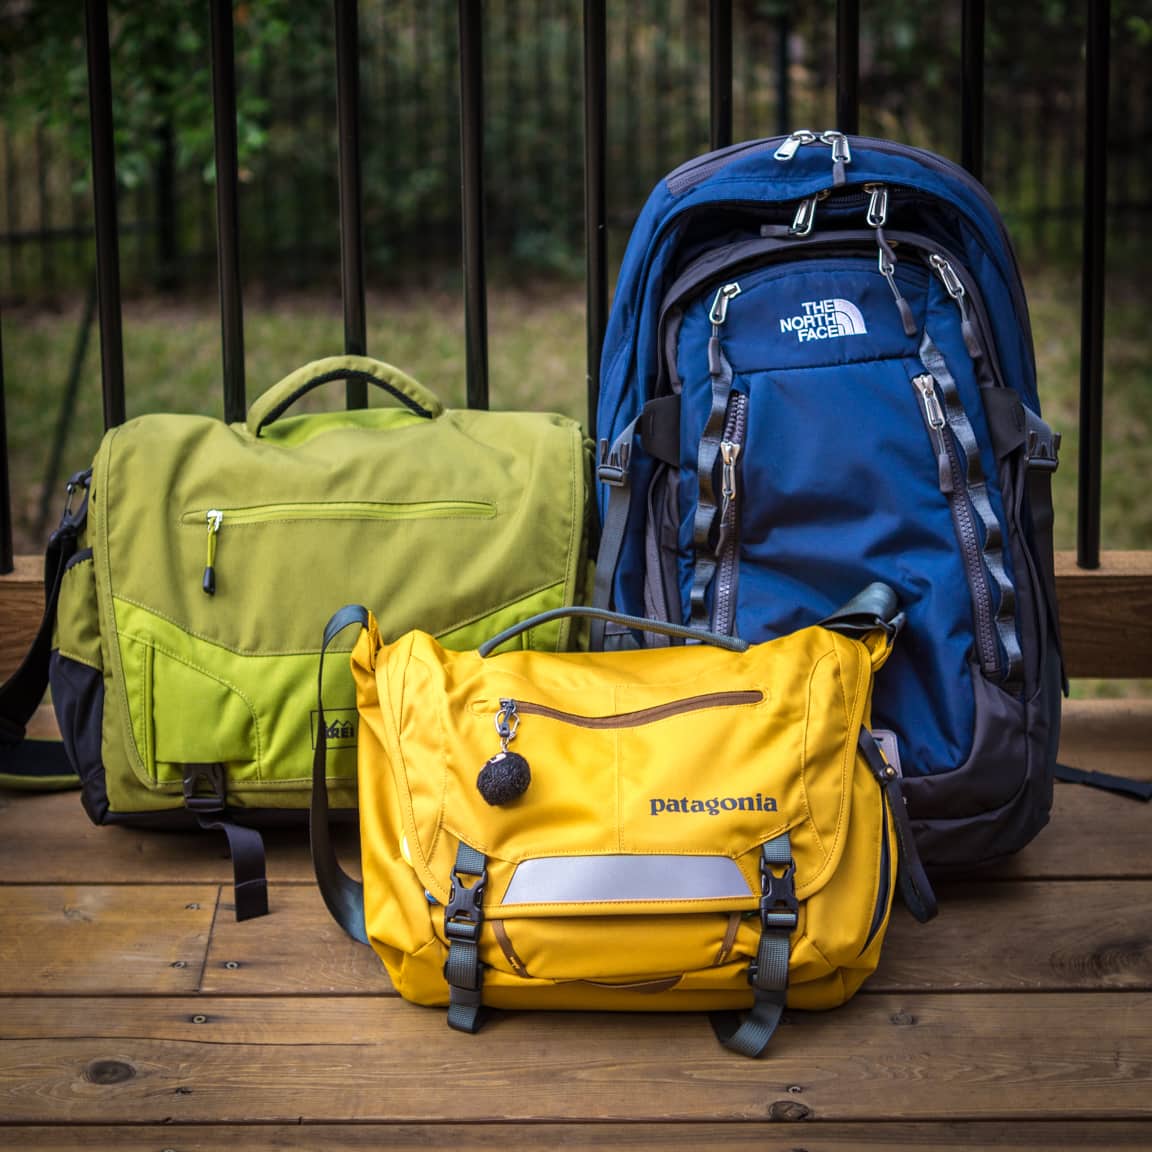
Photo info: FUJIFILM X100T, 23mm, f/3.6, 1/35 sec, ISO6400 Patagonia Minimass, JanSport Hatchet, North Face Router
But, the advantage of the backpack is that it can expand a bit in that top area. I have no problem stuffing my jacket in there, which would be impossible with the Patagonia Minimass.
Also on the plus side, the JanSport Hatchet backpack was relatively inexpensive. I found it on sale for $40, and I had an REI dividend to use, so it only cost me $30 including shipping. That’s only a third of the cost of the Patagonia Minimass, and a quarter of the price of the North Face Router pack. So, I guess the phrase, “You get what you pay for,” definitely applies to bags and backpacks!
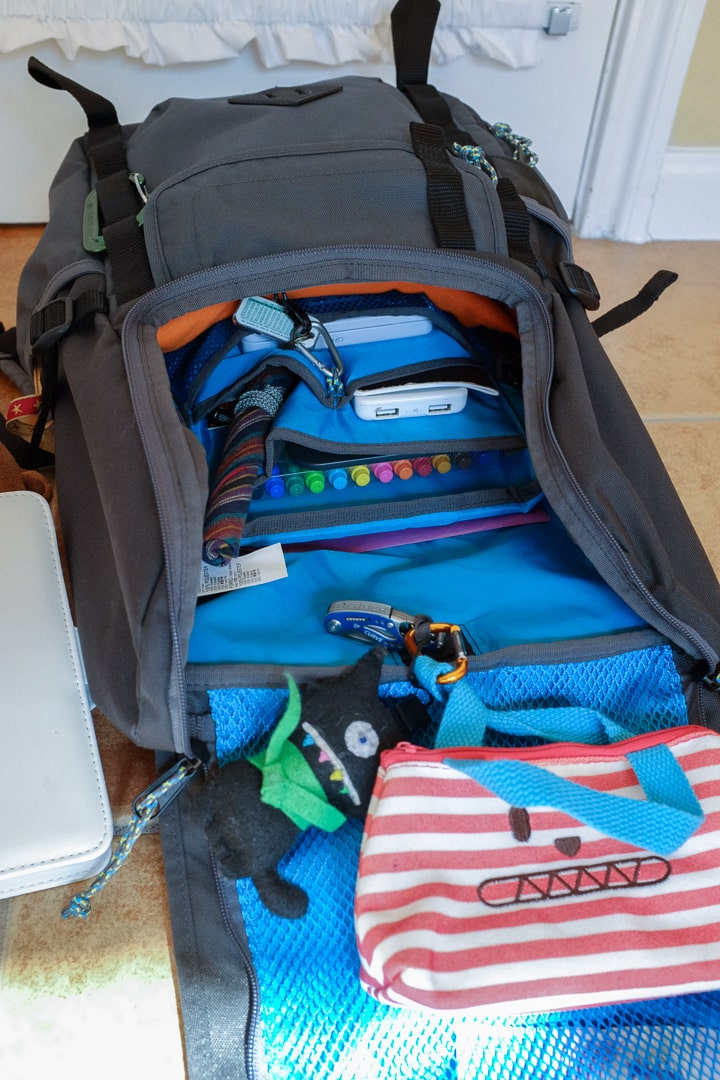
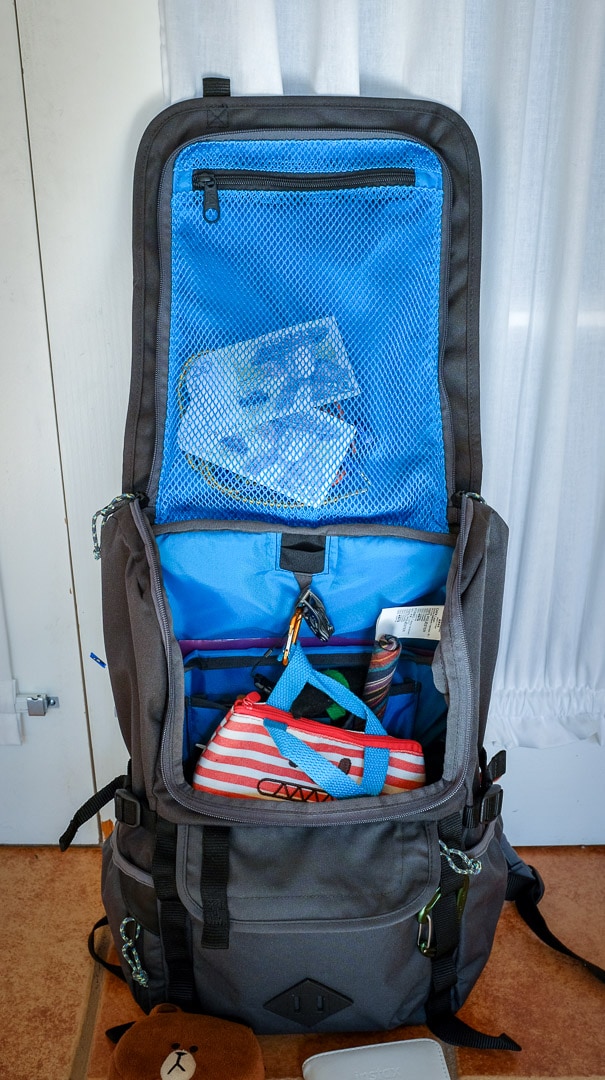
What’s kind of neat is that if you have the flap open, you can use the strap that is on the outside of the flap to loop around a hanger or something, and the backpack can hang on the wall totally open, like some kind of giant travel toiletries kit.
Photo info: FUJIFILM X100T, 23mm, f/5.6, 1/250 sec, ISO800 Jansport Hatchet Backpack in Grey Tar (Flap up)
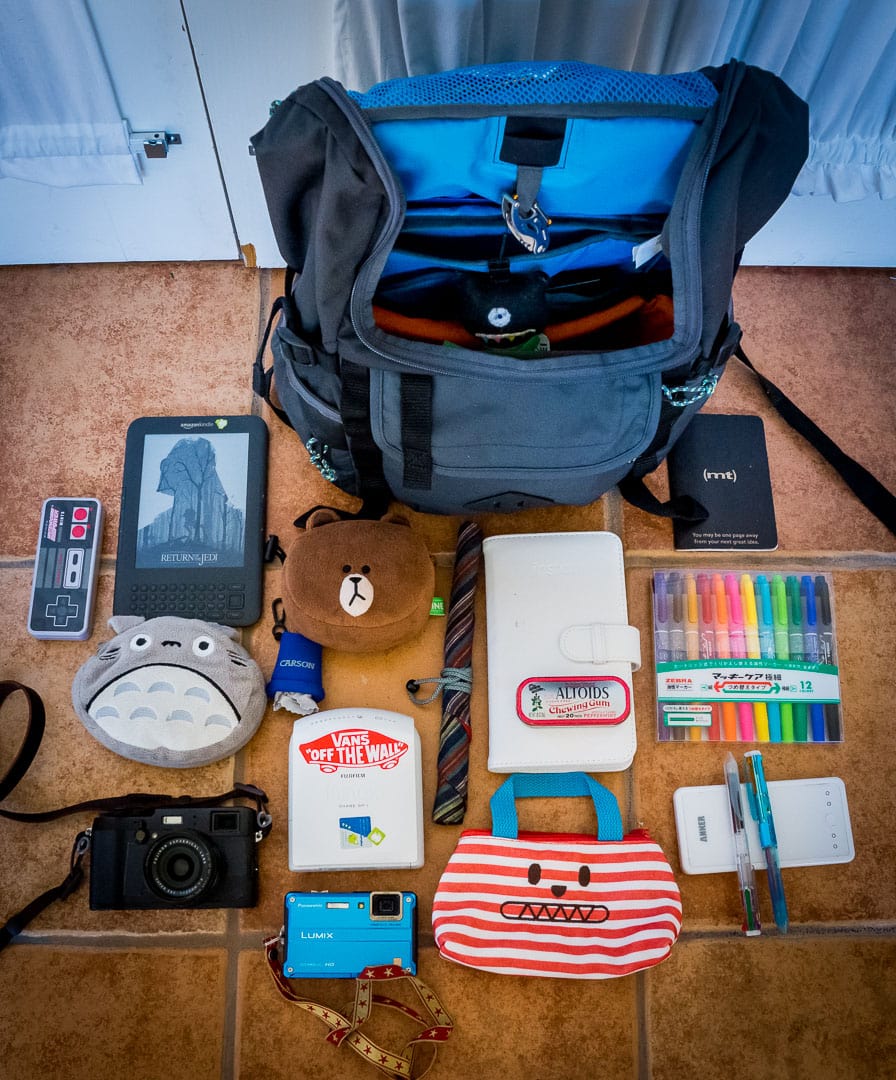
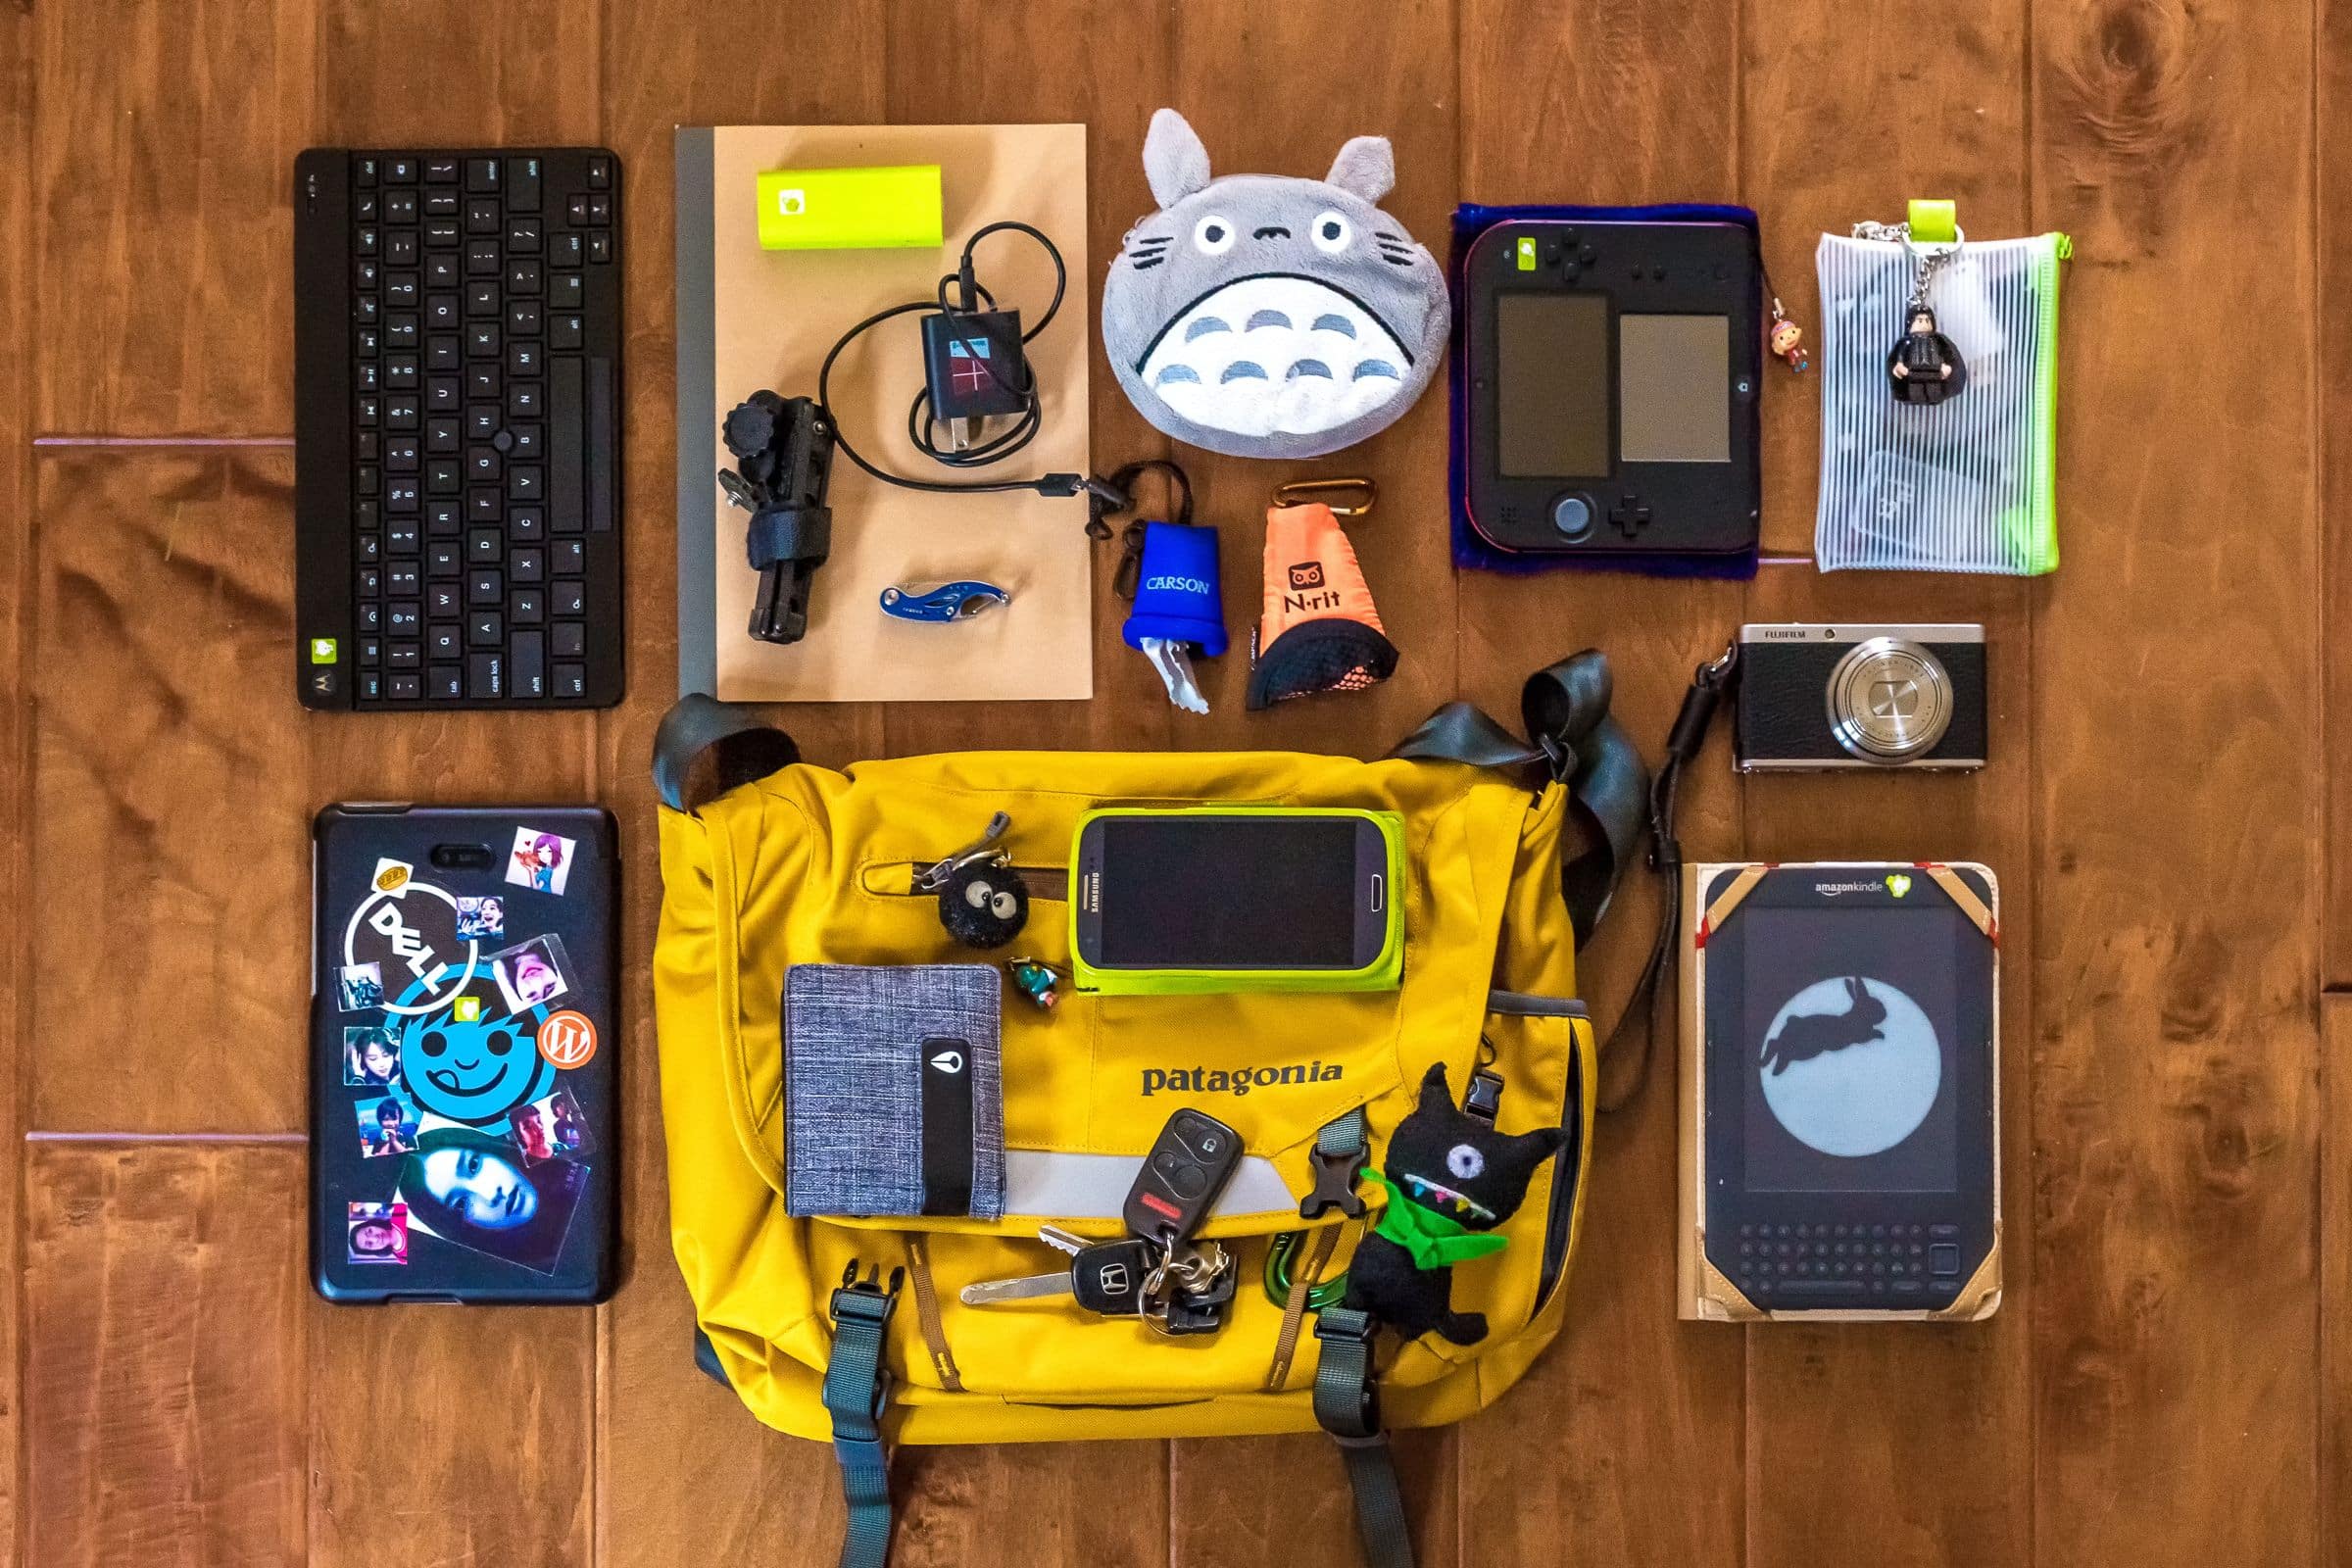
Here’s a look at most of the stuff I keep in the JanSport Hatchet backpack. I just noticed… I have 5 “creatures” along for the ride!
Photo info: SONY SLT-A77V, 16mm, f/6.7, 1/200 sec, ISO800 JanSport Hatchet Backpack (What’s In My Bag)
In conclusion, the JanSport Hatchet backpack is a comfortable, stylish, and functional backpack which has the potential to be great but falls short because of the poor interior organization. Still, for the price, it’s a pretty good backpack. Plus, JanSport backpacks have a lifetime guarantee, so if anything goes wrong or wears out, they will replace it for free! So, I’ll be using my new backpack regularly, while I look for ways to improve the interior situation. 3.5 out of 5 stars!
As I have mentioned a couple times in the past, I am a bit crazy for bags, backpacks, and messenger bags. Tonight I was shopping online and came across a great deal on a cool mid-sized backpack. It was on sale, and also I had an REI dividend to use so I got a great price on this JanSport Hatchet Daypack. I love the design! It looks like it will be a nice addition to my small collection of bags. Its 28-liter capacity seems right between my Patagonia Minimass messenger bag and the cavernous 41-liter capacity North Face Router. I like the Router backpack, but it does get huge!
The only thing about the JanSport is that I am not sure exactly what color REI will ship to me. The website says “Grey Tar/ Shade Grey”, but those are actually two different colors. Both look nice to me, but I am hoping that the darker “Grey Tar” is the one I get. It has a bright blue interior which makes finding things easier.
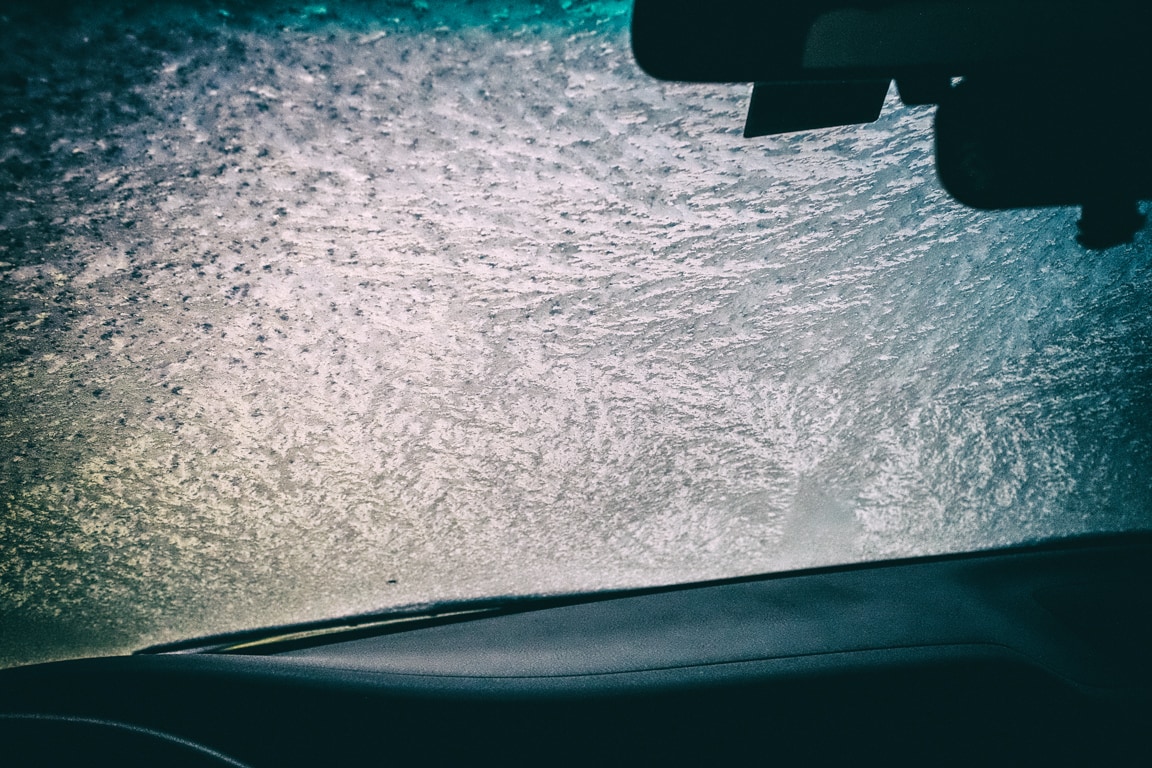
Today was another cold one, with another frozen windshield. The layer of ice this morning was a little thicker than the last one, but still it melted away quickly once I got some warm air coming up from the dashboard.
Photo info: FUJIFILM X100T, 23mm, f/4, 1/90 sec, ISO6400 “Frozen” USA. Texas. Cedar Park. 2016.
I think I am ready for some warmer weather already. I am truly a summer person! 😎
Within the past year’s worth of traveling I have started traveling lighter, paring down the amount of stuff I take, and it has really improved the travel experience! Rewind to last year’s trip to Japan – I took my North Face backpack. It’s large enough that I had no trouble fitting in the proverbial kitchen sink. My thinking at the time is that I wanted a backpack that I could take anywhere. And that could fit my DSLR camera, lenses, and other electronics. My backpack would be a constant companion which I would take everywhere. Here’s a list of stuff I took in the backpack:
Small bag with medicine, bandaids, lipbalm, gum, etc.
The backpack was large, but handled all that gear with ease. The main problem was that it was HEAVY. Also, my camera gear was stuffed into the main compartment which meant that is wasn’t easy to take out and use. Plus, walking around in the summer heat in the city just wasn’t so practical. I still thought I wanted to bring all my stuff with me, but what a hassle it was!
I remember a previous trip to Japan. That trip I decided to just take a waterproof point-and-shoot camera. That was actually a super-fun vacation! And the small camera was a big part of it. Sure, the picture quality wasn’t close to my DSLR, but I enjoyed my trip quite a bit more. I didn’t have to worry about the weight or how to carry all my gear. I just put the camera in my pocket and was all set! Thinking back to that trip, I wonder why I didn’t connect my enjoyment of that trip and the small camera.
In April, I went on a business trip to Stockholm, Sweden. Because I thought this might be my one chance to go there, I should take my DSLR kit and big backpack again. I thought that I didn’t want to miss a great shot. I also took a small Fujifilm X-F1 compact camera as a backup. As you can probably see, camera gear is an important part of my travel kit…
This was a trip where I learned a lot about what kind of traveling I wanted to do in the future. Once again, the backpack was heavy and I rarely used the big camera rig. It was just too much of a hassle to keep at-the-ready. My compact camera was my camera of choice for most of the trip. In fact, the DSLR stayed in the hotel safe! And I have to say, I was happy with the results I got from the Fujifilm X-F1. The photos were more than “good enough”. And I didn’t have to worry about where to put my backpack when we went out for dinners. I left it at the hotel.
My next trip was a solo trip to California to visit my folks and see a concert. I was catching on to this “travel light” concept by this time! I decided to leave the backpack at home and just bring my small Patagonia bag and my Fujifilm X-F1. Also, I took my Kindle, Tablet, keyboard, various cables, card readers and chargers. Traveling lighter was definitely something I was starting to enjoy! And the photos turned out great! Hey, I don’t need the DSLR and all the lenses to enjoy photography!
On my last trip, I went to Stockholm again on business. This time I pared down even more. I left my tablet/keyboard at home. My camera was now my Fujifilm X100T. I also didn’t take a water bottle… why do I need that when there is water available wherever I went? I only needed one small USB cable and plug. My only personal computing device was my cellphone. (I did take a work laptop, but that was used exclusively for business) Here’s what was in my bag:
Fujifilm X100T
USB cable/plug
Spare battery
Pen
Notebook
Kindle
Earbuds
Cellphone
Cellphone battery
Small bag with medicine, bandaids, lipbalm, gum, etc.
Work laptop
My carry-on bag (the Patagonia Minimass) was so light! And when I was on my day off in Stockholm, I didn’t even carry my bag. Just the camera across my body, cellphone, and extra camera battery in my pants’ coin pocket. It was great not having a bag! And I enjoyed myself even more. My shoulders didn’t hurt, I didn’t have to worry about a bag in small shops or crowded museums. I’ve come to realize that having more stuff just gets in the way of having better experiences. It’s not only the distraction of the extra weight, but the distraction of extra things to think about. The less I have, the less I have to worry about. And that means more time and mental energy to spend on simply enjoying where I am. If you haven’t done so, try traveling lighter. I think you’ll be pleasantly surprised that you can get by with so little!
I recently bought a Patagonia MiniMass messenger bag. I have a couple of bags already, so why do I need a new one? I don’t need one, but it is nice to have a new one that fills a specific purpose.
Multiple Bags
The other day I listened to a relatively new photography podcast called “Your Itinerary” whose focus is travel photography. In that particular episode, the host interviews a VP of a camera bag manufacturer. During the conversation, the thought that no one camera bag is perfect for all situations kept coming up. I agree with this thought, and am happy that I can now feel less guilty about satisfying my love of messenger bags and backpacks.
The Current Lineup
Before I bought my new bag, I had two main bags. The first is my REI Messenger bag, with a padded insert for carrying camera gear. The second is a North Face Router backpack, also with a padded insert. Both are good for carrying my dSLR and lenses, the messenger bag being more nimble since I can get the camera out of the bag quickly. The Router holds a lot more and since it’s a backpack, the heavy load is distributed between both shoulders. If I get really tired, there is also a waist strap so I can use it as a pseudo backpacking pack.
The Missing Link
The problem with both of these is that thye are large. Lots of times I don’t want to carry them. I mistakenly thought that I could carry either of these wherever I went and have access to my beloved dSLR (actually SLT, for you purists). But now I realize that a smaller bag would be better for an “everyday carry” and since I have my Fujifilm XF1, I don’t need to carry the dSLR for general walkabout photos. The XF1 and RAW can produce some great photos.
The New Bag
I did some research online, watched video reviews, and then went to REI to check out the bags they had in person, specifically looking for a small messenger bag. The Patagonia MiniMass stood out as the best one, and REI had it on clearance! What great timing! Unfortunately, they didn’t have the color I wanted in stock, but I ordered it online and had it shipped to the store. After a week, I had the bag in my possession.
Patagonia MiniMass
So, how is the bag? In a word: Great! It’s small, but not too small, comfortable, the pockets and storage are for the most part well-thought out. I can fit everything I need into it, and in fact if I wanted to squeeze the dSLR and an extra lens in there, it could do it.
As you can see from the list, there’s a lot that I carry! But in reality, it does not weigh that much. It’s a nice little kit and I can even shoot RAW, edit on my Dell Venue 8 Pro tablet, and post to Instagram all while on the go. One useful feature of this bag is that the two cover-straps also double as compression straps, so you can expand or slim down the width of the bottom of the bag. I wish I had this on my larger messenger bag and backpack!
My Daily Carry
Of course with any bag, there are a couple of things that I’d change. Well, just one in fact! There is only a single outside pocket for a water bottle. This pocket is perfect for carrying the Fujifilm XF1 compact camera, but I wish there was another pocket on the other side so I could carry my 12oz. Liberty water bottle. Since that bottle has a handle, there may be some way to attach it.
All-in-all I love the Patagonia MiniMass messenger bag. It fits into my life perfectly!
Photo info: SONY SLT-A77V, 35mm, f/2.4, 1/350 sec, ISO100 My Bag Collection
Photo info: SONY SLT-A77V, 26mm, f/5, 1/25 sec, ISO1600
I finally got a backpack that I am pretty sure I will keep for a long, long time! It’s the North Face “Router” backpack in Cosmic Blue/Asphalt Grey. There is so much about this model that makes it perfect for me. But first let me tell you about my backpack saga…
Not too long ago, I had two backpacks. One of them was a real backpacking pack, the REI Flash 65. I used it to go on a short backpacking camping trip where we had to hike to the campground carrying all of our gear and food. This pack fit me perfectly and served me well. But, I haven’t gone backpacking since then! So, it’s been sitting in my closet for a couple of years. Through the magic of Craigslist I sold that backpack to someone who could actually use it.
I recently sold my other backpack, the North Face Base Camp Hot Shot, which was a tiny bit too small, and today I sold my REI Flash 65 backpack, so I am officially backpack-less! It might be the first time ever! Well, at least since grade-school oh-so-long ago. But hopefully my new North Face Router backpack will arrive soon. The Flash was perfect the one time I used it for an overnight backpacking camping trip, but after that, it just stayed in the closet… so it’s good that it will find use with a new owner. It’s also good to keep decluttering the house! :)
Like this:
LikeLoading…
My camera & photos
I use a Fujifilm X-series camera for most of the photos on this site and my Instagram. Why not pick one up for yourself?